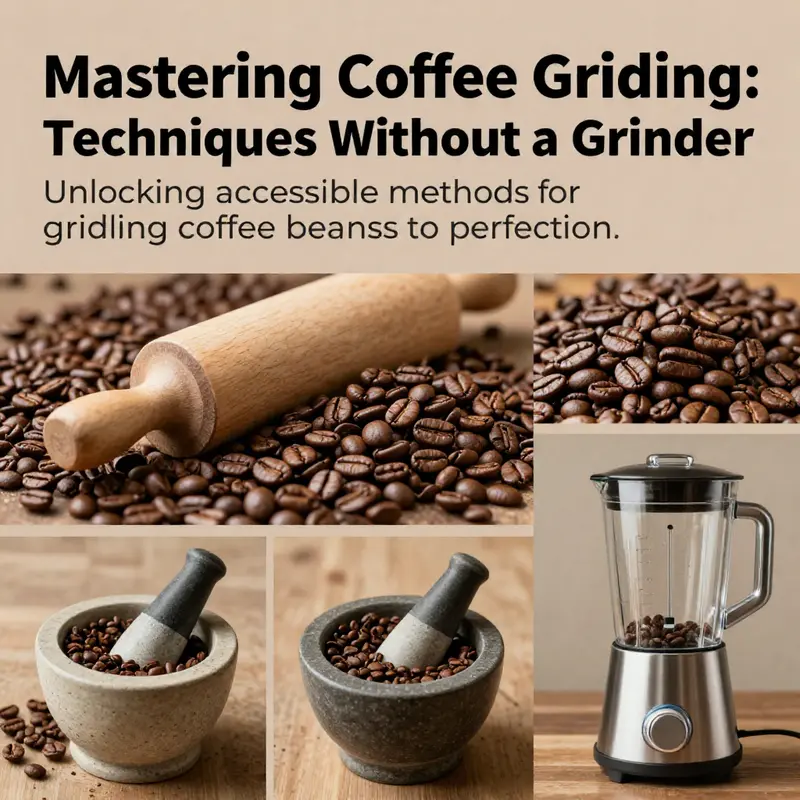
For business owners passionate about delivering quality coffee experiences, understanding how to grind coffee beans without a dedicated grinder can prove invaluable. This knowledge is not only instrumental for enhancing flavor but also ensures operational flexibility when equipment is lacking. In the following chapters, we explore three effective methods: using a rolling pin, employing a mortar and pestle, and utilizing a blender or food processor. Each technique offers unique advantages tailored to different styles of brewing and types of coffee, ultimately allowing you to maintain a high standard in your coffee offerings regardless of the circumstances.
Rolling Pin Alchemy: Mastering Coffee Grinding Without a Grinder
Every morning ritual begins with the aroma of coffee, the promise of a small ceremony that turns raw beans into a drinkable morning companion. When a dedicated grinder isn’t available, the challenge becomes a chance to improvise with the tools already in the kitchen. Among the practical DIY techniques, the rolling pin method stands out for its accessibility, control, and the way it invites the home barista to participate in the science of grind size without muttering about purchase receipts or motor noise. Rolling pins feel almost ceremonial in this role, transforming humble beanlets into a workable powder through a careful marriage of pressure, time, and patience. The goal is not to chase perfection with industrial precision, but to borrow a slice of that precision for a moment and then translate it into a cup that sings with the right texture and personality for your chosen brew method. If you’re curious why this method endures, you only have to think about the act of rolling: it’s a steadier, more controllable deformation of the beans than a hurried chop, a rhythm that respects the bean’s structure while shaping it toward your desired grind.
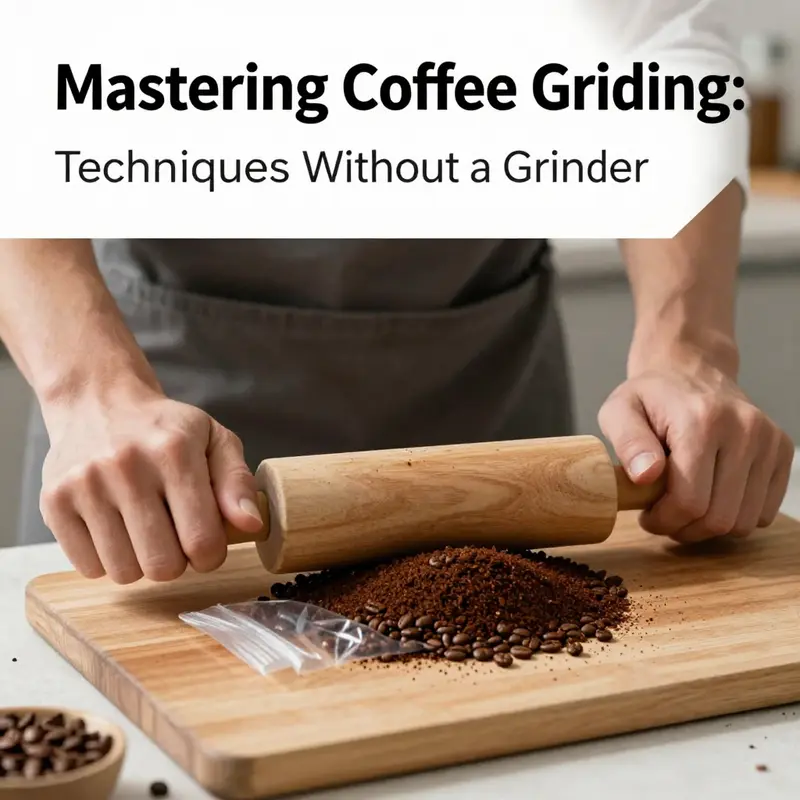
The starting point is almost embarrassingly simple: you gather a modest amount of beans, generally 30 to 50 grams, and you seal them into a sturdy plastic bag. The bag acts as both a containment field and a backstop for the rolling action. Double-bagging is advisable for beginners because it minimizes spillage and reduces the risk of beans scattering in unexpected directions. The air is pressed out so that the beans stay in contact with the bag’s interior, allowing the rolling pin to apply even pressure across a compact surface. This is not about pulverizing with brute force; it’s about delivering uniform pressure that translates into a more uniform ground.
Now comes the act itself: you lay the bag flat on a stable surface—think a cutting board or a thick kitchen counter—and you position the rolling pin across the top. The technique is forgiving but deliberate. With firm, even pressure, you roll the pin back and forth, as if you were pressing dough into submission. The rolling motion must be deliberate rather than frantic; speed invites inconsistency, and inconsistency invites uneven extraction. As you work, you may need to flip the bag, rotating the beans so that the rolling action touches every piece and every fragment has a chance to crack. This flipping is not a test of endurance but a simple way to ensure even exposure to the rolling action. The back-and-forth rhythm helps the beans break down more predictably than a single direction would, a small but meaningful improvement to the end texture.
The stage after initial crushing is crucial. You’re aiming for a coarse powder that resembles the texture of coarse sand or sea salt, with a touch more uniformity than could be achieved by random crushing. If your brew method calls for a medium grind—for pour-over or drip—a touch finer than coarse sand is acceptable, but only if it remains consistently even. To judge progress, you can feel with your fingers or gently press some grounds between your thumb and forefinger. You’ll notice the difference between a few large shards and a uniform granular texture that holds together just enough to flow through a filter. The sense of touch becomes your guide when a scale or a machine is absent. If you’ve ever kneaded bread by feel, you’ll recognize the same sensitivity to texture that bedazzles the senses when it’s done well. Over-rolling can produce fatigue in the wrist, and overworked grounds can begin to clump, so the goal is steady, repeatable action rather than a single heroic effort.
As the grind approaches the target texture, you adapt the motion you employ. A longer, more deliberate roll can refine the texture further, while shorter, sharper passes may produce more variation in particle sizes. The key is to keep the process contained and controlled. A neat trick many home brewers use is to tap the bag lightly at intervals, especially if you notice the larger chunks clinging stubbornly to the inner surface of the bag. This tapping helps detach those chunks and encourages them to blend into the surrounding grounds, reducing the risk of an impression of inconsistency when you pour or press. In a sense, you’re performing a quiet ritual of texture stabilization, a counterpoint to the chaotic chaos of misshapen fragments that sometimes arise when grinding with improvised tools.
Once you reach a consistency you’re reasonably happy with, the next step is simple yet transformative: transfer the grounds to a filter and brew as you would with any other method. The options here are flexible; a paper filter in a pour-over dripper, a cheesecloth in a makeshift setup, or even a French press can all accommodate the grounds you’ve produced. The transfer itself matters as much as the grind because it preserves the integrity of the texture you created. If you’ve managed to land on a medium grind, pour-over lovers will experience the sweet balance of extraction, where the water meets the grounds evenly and the bloom is neither excessive nor timid. If it’s closer to a coarse sand texture, a French press brew will likely reveal more body and clarity, the result of larger particles resisting over-extraction while still allowing the oils to carry flavor. The beauty of this method is the way it remains faithful to the beans’ character, because the grounds haven’t spent a lot of time in contact with heat or friction that would strip away nuance.
The rolling pin technique is not only about the mechanics; it’s a philosophy of process. The containment principle is the axis around which the method revolves. A bag keeps the mess tame and the process predictable, and it ensures that you don’t lose precious aromatics or a portion of the batch to a kitchen accident. Consistency follows containment; when you can reproduce the same sense of texture across multiple batches, your days of trial-and-error grinding begin to fade. The texture you’re aiming for is intimately tied to your brewing method, which means you’re not chasing a universal grind. You’re shaping the grounds to harmonize with the water’s path through the coffee, the dwell time in contact, and the pressure you apply during the final extraction. In practice, this means that every time you brew with the same technique, your rolling action can be slightly adjusted to nudge the texture toward a new equilibrium without abandoning the core approach.
The rolling pin approach shines in its democratized accessibility. It doesn’t demand a high-tech gadget or a dedicated appliance, and it doesn’t require you to stock up on special burrs or plates. The rolling pin, a familiar kitchen tool, becomes a bridge between the ritual of grinding and the science of extraction. For beginners, this method offers a forgiving entry point. It invites you to observe how changes in pressure, roll length, and the number of passes influence the final texture. You learn to listen to the beans—the crackling sound as they break, the faint dust that wafts upward, and the way the aroma changes as the grind develops. These are small, sensory cues that deepen your connection to the coffee in your cup and sharpen your intuition about grind size, even without a machine measuring every particle.
Still, every method carries trade-offs, and the rolling pin is no exception. Compared to a mortar and pestle, which is renowned for uniformity and flavor preservation due to its steady, controlled grind, the rolling pin relies more on the user’s technique and consistency. It’s less likely to achieve the micro-uniformity a stone grinder might provide, especially when you’re working with a larger batch. However, the rolling pin’s speed and simplicity can be a real advantage when you’re in a rush or when a grinder is temporarily out of commission. The rolling pin technique also gives you a direct, tactile connection to your coffee, a hands-on practice that can be both comforting and educational in its own right. It’s about finding a balance: acceptable uniformity, preserved aromatics, and a workflow that respects your time and space.
When you consider the full spectrum of DIY grinding possibilities—mortars and pestles, blades in a blender, or improvised hammers—the rolling pin stands out for a certain measure of control. It’s not a quick fix that promises espresso-grade fineness; rather, it’s a practical, repeatable method that can yield a respectable medium grind for pour-over, drip, or even gentle cold-brew preparations. The texture may not be perfectly consistent from one batch to the next, and that variability can translate into slight differences in extraction and flavor. But that variability is not a flaw; for many home brewers, it’s part of the character of a coffee made with intention and care in a setting where gear is limited. You still can dictate the outcome with deliberate pressure, measured passes, and mindful resting—if your kitchen space allows for such a ritual, you will taste the difference in the cup.
An important practical note concerns freshness. The moment coffee is ground, its surface area expands dramatically, and the exposed compounds begin a gradual, inevitable loss to oxidation. This is why the guidelines in any coffee discussion emphasize grinding just before brewing. The rolling pin approach, with its quick workflow and contained process, tends to minimize the time between grinding and brewing, helping to preserve the volatile oils and delicate aromatics that make coffee compelling. If you’re traveling, staying in a small apartment, or simply trying to keep things simple, the rolling pin method makes it easy to produce a respectable grind in minutes, without pre-grinding and without the need to store grounds for any period longer than necessary. It’s a practical ritual rather than a laboratory procedure, and that practical spirit often translates to a more satisfying everyday cup.
To further refine your technique, you can experiment with two small variables: the size of the bag and the number of passes you perform with the rolling pin. A thicker bag can withstand more aggressive rolling without tearing, allowing you to push a little harder while remaining backed by a protective layer of plastic. If you notice the grounds become too powdery, ease up on the pressure or shorten the number of passes. If you’re chasing a slightly finer texture for a stubborn drip, gradually increase the number of passes while maintaining even distribution of pressure across the bag’s surface. It’s a careful calibration, and like any calibration, it rewards patience and observation. Over time you’ll form a sense for how many rolling cycles yield a consistent grind for your preferred brew method, and you’ll find that your coffee routine gains a reliable rhythm even when the day’s equipment is limited.
In the broader landscape of coffee preparation, the rolling pin method deserves a place alongside other no-frills approaches because it embodies the principle of resourcefulness. It respects the fundamental science of grind size, extraction, and flavor development while offering a practical, low-cost path to a well-made cup. It’s not a miracle cure that will conjure a professional-grade grind from a home kitchen without any effort. Instead, it’s a disciplined, human-centered method that relies on you—the brewer—to direct the process with intention. The rolling pin becomes more than a tool; it becomes a conduit for learning, experimentation, and a deeper appreciation for what happens between the bean and the cup. When you finish grinding and you’re ready to brew, the moment is almost ceremonial: you scent the grounds, you watch the bloom, you hear the water meet the coffee, and you taste the fruit of your careful hands. Those moments are often the most satisfying parts of the coffee-making ritual, especially when they arise from a technique that turns everyday kitchen objects into a gateway to flavor.
If curiosity leads you to compare methods, this rolling pin technique remains a reliable baseline. It gives you a consistent sense of how grind size affects extraction without requiring an investment in equipment. You can then move on to a mortar and pestle for a potential leap in uniformity, or you can keep relying on the rolling pin for casual mornings when time is tight. Either path reinforces a larger idea: great coffee is not a product of a single gadget but a practice. The rolling pin method embodies that practice in a direct, approachable way, and it invites you to participate, to observe, and to refine. And as you become more confident, you’ll notice your palate responding to the subtler distinctions—the way a slightly finer grind can lift sweetness, or how a coarser texture can emphasize body and mouthfeel. These are the discoveries that turn a simple kitchen exercise into a personal coffee philosophy, one that doesn’t hinge on the presence of a specialized device but on a mindful, repeatable craft you can call your own.
For readers who want a visual map of this method, a comprehensive guide is available that walks through the steps with photos and careful notes about technique. In that resource, you’ll find additional tips about achieving consistent results and avoiding common missteps, such as overheating the grounds or accidentally over-crushing to the point of dust. While the rolling pin method is not the only route to a respectable cup when a grinder is absent, it remains one of the most accessible and forgiving. It invites you to take charge of your grind, to trust your senses, and to savor the moment when the coffee finally reveals its true character in the cup. The kitchen becomes a small workshop where texture, aroma, and timing converge to provide a tangible sense of accomplishment every time you brew.
In closing, the rolling pin method is more than a workaround. It is a reminder that creativity can flourish in constraint, and that the best coffee experience often starts with a deliberate, unhurried action performed with what you have at hand. The technique teaches you to respect the beans, to understand how grind size modulates extraction, and to value the freshness that comes from grinding just before brewing. With patience and practice, you’ll find your own quiet rhythm—one that turns a simple kitchen tool into a reliable partner in your daily ritual. Whether you’re preparing a morning pour-over or a weekend slow-brew, the rolling pin approach offers a tangible path from beans to cup that honors the ingredient, the process, and the person doing the brewing.
For readers seeking further guidance and visual demonstrations, consult detailed step-by-step instructions in the external resource linked here. The guidance there complements the approach described above, offering variations and troubleshooting tips that can help you refine your technique over time: https://www.thespruceeats.com/grind-coffee-beans-without-grinder-1779668
Mortar and Pestle Coffee: Grinding by Hand

Grinding coffee by hand with a mortar and pestle connects you to the bean’s origin and to a slower, more tactile ritual. When you lack a grinder, this ancient tool becomes a capable workaround that rewards patience and control.
Basics: aim for uniform particle size, stable pressure, and mindful timing. A granite or marble mortar provides weight and a nonreactive surface, while the pestle should feel solid in your hand. Work in small batches, 10–15 grams, break the beans, then grind with steady circular motions until you reach a texture between coarse sand and fine meal.
Practical notes: grind just before brewing for maximum aroma. Store ground coffee at most a day if needed, in a cool, dry container. Use a consistent rhythm; avoid overheating the beans, which can dull flavor. The mortar and pestle may require more time, but it offers direct control over texture and aroma.
With practice, you can adjust grind size to suit pour-over or French press. This method is a mindful alternative when electricity is limited or when you want to slow down and listen to the grind.
Blades Without a Burr: Grinding Coffee Beans in a Blender or Food Processor
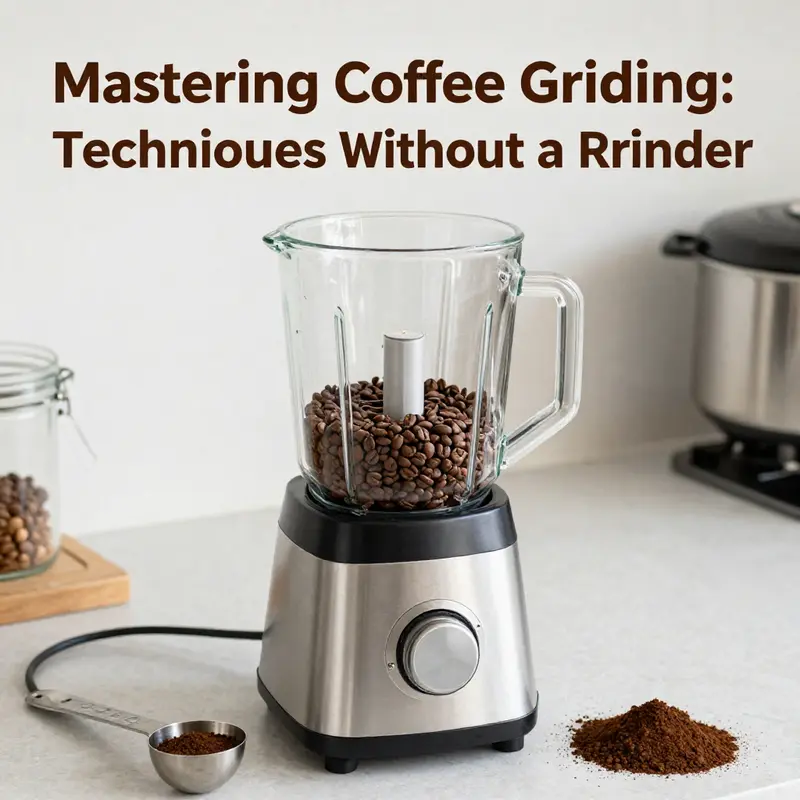
When a dedicated grinder isn’t at hand, a blender or food processor can still rescue your morning ritual. It’s fast, it’s convenient, and it’s a route many home users reach for in a pinch. But the trade-off is real: these appliances cut rather than crush, they surge with power, and they can heat coffee beans enough to nudge flavor in unwanted directions. This chapter keeps the focus on what blender-based grinding can do well, what it compromises, and how to tilt the odds in favor of a cup that tastes surprisingly bright given the constraints. It’s not a replacement for a burr grinder, especially for espresso or precise pour-over, but it is a practical workaround when time and budget collide with your caffeine needs. The goal is to make a blender or a small processor behave as reliably as possible within its own limits, and to help you understand when this method is worth choosing over the alternatives already explored in the chapter you just worked through.
Mechanics matter here in a way that is different from the familiar burr grinding path. A burr grinder makes a uniform surface on every particle, producing a predictable extraction. A blender—driven by fast-spinning blades—produces a chopping action across the beans. You’ll often end up with a spectrum of particle sizes: some particles are almost as fine as flour, others remain notably coarser, and a few shards still carry a visible bean shape. This mix can be more challenging to dial into an ideal extraction, because the finer pieces over-extract while the coarser fragments under-extract. In practical terms, this means the same brew method can yield inconsistent results from batch to batch, and a single cup may taste uneven in character from sip to sip. Yet there is a silver lining: when the grind is too coarse for your brew, a blender can be coaxed into producing something finer than you’d achieve with a knife or mortar and pestle, and the process remains remarkably quick and accessible.
To use a blender or food processor effectively, start with a modest batch. The most reasonable upper limit tends to be fifty grams per cycle, with smaller tests recommended if you’re still calibrating. This keeps the blade workload manageable and helps prevent overheating. In practice, a common approach is to work in 25–40 gram segments, especially if you’re aiming for a medium-fine texture suitable for drip or pour-over, or closer to a coarse flour for a robust press-style brew. The goal is not to mimic a perfect, even grind but to reach a texture that’s workable for your chosen method while maintaining the aromatic integrity of the beans as much as possible. Once you have a sense of your blender’s capabilities, you can adjust the batch size to balance speed and control.
The technique itself centers on short, controlled bursts rather than a continuous grind. The literature and practical experimentation converge on a simple pattern: pulse the blades, then pause to assess texture and allow heat to dissipate. The specific cadence matters for flavor preservation. While a few sources once suggested quick, one- or two-second pulses, more conservative guidance emphasizes longer bursts followed by deliberate rests to avoid overheating. In this context, using five- to ten-second bursts with intermittent cooling breaks is a practical compromise. Between bursts, pause briefly—twenty to thirty seconds is often enough for the blades to regain their cool. This rhythm reduces the chance that friction will bloom into unwanted heat, which can drive off delicate aroma compounds and subtly alter the cup’s balance.
What that texture should look like, and how to steer toward it, depends on your brewing plan. For most home brews that rely on drip or a well-ted pour-over, you’ll want a texture somewhere between coarse sand and fine cornmeal. In other words, a powdery, not gritty, feel with a mix of granules that are not too uneven. If you’re chasing a grind closer to espresso fineness, be prepared for the texture to slip toward a powdery dust that may not behave like a true espresso grind. In practice, you can achieve a workable mid-ground by running the blender with short pulses, then letting the mix settle for a moment, giving you a chance to check the texture, and then adding a few more pulses as needed. If large, stubborn chunks remain, you can further process only those portions in subsequent cycles, rather than overworking a full batch all at once. The important thing is to stay mindful of uniformity while recognizing that absolute uniformity is unlikely with blade-based grinders.
The flavor implications deserve careful attention. The heat generated by blade speed is the main villain here. Even brief overheating can nudge delicate aromatics toward dullness and can slightly alter the perceived sweetness and acidity of the coffee. The blender method, when pushed too hard, risks producing a bitter or flat cup because some particles over-extract while others under-extract. The practical response is to manage time and temperature as a first-class ingredient. Ground coffee loses its volatile aromatics quickly, so grinding just before brewing remains a central maxim. If you’re preparing coffee for guests or for a schedule that requires you to grind ahead of time, remember that any pre-ground coffee will oxidize and lose its nuances much faster than whole beans, and a blade-ground batch will degrade more rapidly than a uniform burr-ground batch over the same timeframe. This is not a failing of the blender approach; it’s a property of the material you’re working with, magnified by blade action.
A stepwise discipline helps here. Begin by selecting fresh beans and measuring a batch that aligns with your brew plan. Clean, dry beans grind more predictably than oily or recently roasted beans that cling to the blade or container walls. Place the beans in the blender jug or the processor bowl, keeping the unit dry and free of any residue from prior uses. If you can, lightly pat the beans to reduce clumping before you begin. Set the blender to its lowest practical speed if your model offers adjustable speeds, or simply rely on standard blade action for a rough start. Start with a five-second pulse, then pause. Check the texture by feel and visually inspect a small sample of the ground coffee. If the texture resembles coarse flour or finer cornmeal, you’re on the right track for a typical pour-over or drip brew. If you need something a bit finer, continue with one or two additional five-second pulses, always with rests in between and a careful eye on texture. If you encounter obvious variance in particle sizes—some grains still clearly intact while others are dust—you might tilt toward shorter pulses and more frequent checks, which helps reduce the risk of over-processing a portion of the batch.
A practical note for texture control is to run the batch not just to achieve a consistent grind size but to maintain an overall consistency of extraction. A good rule of thumb: after you deliver a texture that’s workable for your brew, stop grinding and let the coffee sit a moment. Then, if you notice a few stubborn larger pieces, you can target those with another brief pulse rather than reinvigorating the entire batch. This approach minimizes the chance of producing too much fines, which can lead to an overly rapid extraction and an abrupt, one-note cup. If you’re aiming for a finer texture for a particular method like espresso—recognize the caveats. Blended, blade-ground espresso attempts can feel motivating, but the results are rarely as stable or predictable as with a proper burr system. Some home enthusiasts nonetheless report acceptable results by combining a blade grind with a post-grind screen pass, using a fine mesh to separate the smallest particles, but that process adds another step and another variable to manage.
Beyond texture, aroma, freshness, and temperature are the variables you’ll most notice. The blender method is undeniably convenient only if you approach it with a plan for minimizing heat and maximizing batch-to-batch consistency. Cooling breaks between pulses are not just about comfort or machine safety; they’re about preserving the delicate volatile compounds that give coffee its character. If you’re a meticulous home barista, you’ll appreciate the value of keeping your equipment cool, your batch small, and your workflow steady. You’ll also accept the fact that this path prioritizes accessibility and speed over precision, which is a fair trade for those many mornings when time and money constrain your options. If you want to explore the most consistent results with minimal risk of overheating, the only sure path is to pair blender use with a plan that leans toward more uniform extraction, such as using a dedicated grinder when feasible or selecting a brew method that tolerates a wider range of grind sizes.
The broader context here is not to pretend the blender is a perfect substitute for a burr grinder in every scenario. Rather, it’s about embracing a practical skill, one that lets you honor the fundamental rules of coffee while working within the limits of what you have. The most important rules are simple and universal: use fresh beans, grind close to brewing time, avoid pre-ground stock, and tailor your grind to your brew method. The blender method adds a few caveats to respect—chiefly heat and particle-size variability—but it also grants a degree of flexibility. When you’re in a kitchen that lacks a dedicated grinder, the blender offers a viable path that, with discipline, can deliver a respectable cup and keep your coffee ritual intact.
In this sense, the blender method becomes less about achieving espresso-grade finesse and more about maintaining the rhythm of a morning routine. It provides a bridge between the time-honored practice of grinding and the practical realities of modern living. The technique calls for patience, attention to heat, and a willingness to accept some variability in texture. It rewards those who are curious and methodical: you learn to listen to the grind, you watch the texture evolve, and you adjust your cadence to protect flavor. For those who want a more dramatic improvement in consistency without a burr grinder, the subsequent chapters will guide you through strategies that pair blade-based grinding with simple post-processing steps, such as sieving or re-grinding, and will contrast these outcomes with the stable, repeatable results you receive from a proper grinder. In other words, this approach doesn’t stand alone as a final solution, but it does offer a meaningful, learnable method that can sustain your coffee habit when the alternative is waiting or telescoping expenses.
If you’re curious to broaden your understanding or want a visual, step-by-step reference to related techniques, you can explore further guidance linked from a broader compendium of ground-coffee knowledge. For additional context that expands beyond the kitchen, you can examine a related discussion here: https://coffee-beans.coffee/blog/how-occupational-therapy-aids-in-stroke-recovery/. This resource is not about coffee grinding, but it demonstrates how people adapt everyday tasks with improvised tools—an approach that resonates with the mindset needed to grind with a blender in a pinch. It underscores the value of practical, patient-centered problem-solving, a theme that threads through all the chapters as you learn to work with what you have while preserving as much of the coffee’s essence as possible.
For readers who want a reliable external reference that aligns with the blender approach, the literature notes similar cautions and practical steps. In particular, a widely cited guide emphasizes that blending coffee beans is a fast option but comes with risks of uneven grind and flavor degradation due to heat. The recommended practice is to use short bursts and to monitor temperature closely, pausing to let the grounds cool before continuing. This external resource reinforces the idea that, while feasible, blending is best considered a temporary or auxiliary method rather than a primary grinding solution. If you’d like a deeper dive into the mechanics and trade-offs, you can consult the detailed discussion found in the related article on grinding coffee beans in a blender.
In sum, the blender or food processor method is a pragmatic tool in the coffee toolbox. It is a reminder that coffee craftsmanship is as much about improvisation and technique as it is about equipment. When you approach blade grinding with the right cadence, batch size, and texture targets, you can produce grounds that meet your brewing needs without spending a fortune or waiting for a more specialized device. The flavor payoff may not always rival a burr-ground batch, but the experience is valuable: you learn to respect the delicate balance between speed and scent, control and chaos, and how to keep the coffee’s character intact even in a moment of improvisation. And when the next chapter invites you to compare methods side by side, you’ll have a clearer sense of where blade grinding shines, where it falls short, and how to tune your approach to your preferred coffee ritual.
External resource: Can You Grind Coffee Beans in a Blender? https://www.thespruceeats.com/grinding-coffee-beans-in-a-blender-1293867
Final thoughts
Empowering your coffee business with the knowledge of alternative grinding techniques can enhance the quality and freshness of your brew. Whether employing a rolling pin for simple processing, a mortar and pestle for flavor preservation, or a blender for quick results, each method presents a practical solution for various situations. These techniques not only facilitate preparation under constraints but contribute to the art of coffee-making that every business owner should embrace. Prioritizing freshly ground beans will set your coffee apart in a competitive market, ensuring customer satisfaction and loyalty.