
For many coffee enthusiasts, the ritual of grinding coffee beans is an essential step in crafting the perfect cup. However, not every coffee lover has access to a dedicated grinder. Understanding how to grind coffee beans without one can be particularly valuable for business owners in the food and beverage industry, ensuring product quality and flavor consistency even in a pinch. This guide delves into practical techniques that can be easily implemented, from using a rolling pin to employing kitchen knives. Each method will not only help you achieve the desired grind size but also preserve the aromatic properties of your coffee. Let’s explore these techniques in detail.
null
null
From Stone to Steam: Mastering Fresh Coffee Grounds with a Mortar and Pestle
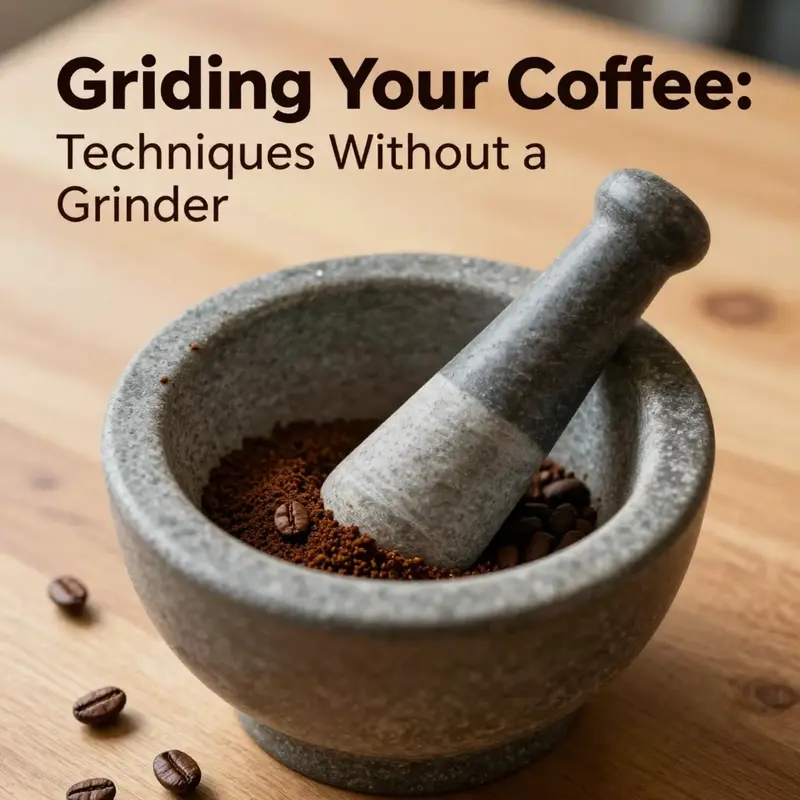
Grinding coffee without a dedicated grinder invites a different kind of attention to technique and timing. When you reach for a mortar and pestle, you step into a small ritual that honors the bean’s complexity and its volatile oils, releasing aroma through the friction between stone and metal. The mortar and pestle is more than a tool; it is a reminder that coffee making can be tactile, deliberate, and intimate. This approach thrives when you want to capture brightness and nuance in a tiny batch, when a grinder is absent, or when you simply crave a hands-on connection to your coffee before you brew. The method asks for patience and a willingness to feel the texture, to listen to the crack and pop of bean fragments, and to adjust your technique as you go. It starts with a small quantity, grows through control rather than speed, and finishes with a fresh cup whose aroma carries a trace of the work you put in to coax it forward.
Choosing the right beans and the right surface lays the foundation for success. A small amount—about one to two tablespoons—keeps the process manageable and helps you achieve a more even grind without spilling. The choice of mortar matters; the sturdiest options are heavy, with a granite or basalt composition. These materials resist sliding and possess enough density to translate pressure into effective crushing without needing brute force. A heavy bottom stabilizes the task, keeps the work contained, and minimizes chatter that can scatter fragments. The pestle should fit comfortably in your hand, providing a steady grip that allows you to press with consistent force. Comfort is not a luxury here; it is a practical concern that directly affects your control over texture.
As you begin, visualize the grind you want. For pour-over or lighter drip profiles, you aim for a texture somewhere between cracked pieces and a fine sand-like consistency. A Turkish coffee grind or a fine espresso powder would be more difficult to achieve with a mortar and pestle and may require extended effort, a more aggressive grinding motion, and even then you should temper expectations about uniformity. The process is iterative. You start by placing a small measure of beans in the mortar and applying firm, deliberate pressure with the pestle. Circular grinding becomes a rhythm: press, rotate, and lift, then press again. You want to move beyond mere crushing into a controlled pulverization, adjusting your pressure as the fragments break down. The goal is to let friction do its work, releasing essential oils and aromas as the surface area increases. The scent that rises—the chocolatey, fruity, or floral notes depending on the bean—tells you you’re on the right track, but you should also stay attentive to the texture developing beneath your fingers.
The texture outcome is the real measure of your progress. Unlike mechanized grinders, a mortar and pestle does not guarantee uniform particle size. You will encounter a spectrum—from larger fragments to small crumb-like particles. The key is to manage that spectrum with intent. If you plan a steadier extraction, you’ll want more uniformity; in that case, you can refine by grinding longer, then sifting and regrinding any larger pieces that remain. The sifting step can feel almost meditative. A fine sieve separates the powder from the chunkier bits, and the larger pieces you regrind until they meet your target. The benefit of this approach is the control you gain over batch size and the opportunity to taste how different grind proportions influence extraction in your specific brew method.
Another layer of sophistication comes from the sensation of heat and how you respond to it. Friction inevitably warms the beans as they are worked. If you push too hard or grind too long in one sitting, heat can alter the delicate oils and change the cup’s flavor profile. You can counter this by grinding in shorter bursts and allowing a moment for the material to rest, particularly when working with aromatic beans. If the aroma starts to fade in your palms, you’ve likely overheated the batch. A short pause can preserve aromatics and prevent a dull finish in the cup. This is not an issue of keeping time on a timer; it is about reading the coffee’s behavior through sight, scent, and the way the powder moves when you lift the pestle.
The method’s gentleness is part of its charm. You do not rely on speed to break down the bean; you rely on persistence and precision. That is why the grinderless approach has a certain appeal for delicate, nuanced cups or when you’re aiming for a specific extraction profile with a pour-over or a slower brew. The control you gain through tactile feedback can reveal subtle changes in aroma that eventually translate into a cleaner, brighter cup with articulate brightness and a longer, more balanced finish. Over time, you start to understand how the bean’s origin and roast level interact with your technique. Darker roasts often benefit from slightly coarser grind sizes and a bit more agitation, while lighter roasts may reveal more nuance with finer partials, provided you pace your grinding and avoid overheating.
The technique also invites you to think about the batch’s scale. In practice, one to two tablespoons is a practical limit for the mortar and pestle. It keeps the process manageable and ensures you can maintain the consistency of your effort. The moment you exceed this amount, you risk uneven results and more difficulty controlling the texture. When you grind smaller batches, you can observe more clearly how small adjustments in pressure or rotation change the powder’s fineness. And small batches keep the aroma concentrated enough to be captured by your brewing water, which is crucial since coffee’s aromatics begin to dissipate quickly after grinding. Grinding just before brewing remains a universal rule, even for this manual, hands-on method. The moment you smell the oils release, you’ll know that time has value and timing has power.
If you are curious about how this approach relates to other disciplines that emphasize hand tools and precise control, you can explore resources about tools and equipment for occupational therapists. There is a surprising continuity in the way professionals think about grip, pressure, and control across contexts. The corresponding resource, Tools and Equipment for Occupational Therapists, discusses how hand tools are chosen and used to optimize function, a reminder that the mechanical principles at work when you grind coffee—control, feedback, and safe application of force—are universal across crafts. Tools and Equipment for Occupational Therapists can offer a parallel perspective on selecting the right tool for a delicate, deliberate task, and it underscores how good technique transcends the specific purpose of a tool. This cross-disciplinary angle can enrich your practice of grinding coffee by grounding it in a broader understanding of how humans interact with tools to achieve refined results.
Toasting the beans lightly before grinding can also play a role, especially when you’re starting with raw green beans or beans that need a lift in aroma. A light toast wakes up the oils and fragrances, making the subsequent grinding feel less effortful and more fragrant. It is essential to monitor the beans closely because the line between a pleasant enhancement and an overheated roast is fine. You want to bring out a little more complexity without venturing into burnt or bitter territory. After toasting, let the beans rest briefly before grinding to avoid steam and moisture from interfering with your powder’s texture. Storing the ground coffee promptly after grinding is another practical habit; air can degrade aromas quickly, so transfer the grounds to an airtight container with minimal delay. The aim is to preserve the moment when the oils are most alive, right after the friction and the aroma have peaked.
In terms of brew compatibility, the mortar and pestle shines when you’re after a clean, articulate extraction with pour-over or a well-balanced French press, rather than when you’re chasing the dense, syrupy body that sometimes comes with very fine grounds and aggressive agitation. The coarser segments produced by this method can pair beautifully with a drip-style brew, where a steady, predictable extraction brings forth clarity and brightness without the risk of overextraction that sometimes accompanies uneven particle sizes from improvised methods. The coffee’s character will carry through the water, and the resulting cup will reward patience and attention to texture rather than speed. You will taste a cup that broadcasts the bean’s origin and roast with a sense of immediacy that only a freshly ground, hand-worked batch can deliver.
For those who want to bridge the gap between a traditional method and modern convenience, the mortar and pestle invites experimentation. You might vary the amount you grind, the duration of grinding, or the pressure you apply to see how these variables shift the grind’s fineness and, in turn, the extraction’s character. You can adopt a ritual where you measure, grind, rest, and brew, treating each step as a deliberate act rather than a mere precursor to the cup. The reward is a cup that tastes of your careful attention, of the quiet work you performed with a simple, time-honored tool. And yet, the method remains accessible; you can begin with a modest batch, a sturdy surface, and a calm room, then expand as you grow more confident in your control.
In summarizing the approach, the mortar and pestle method excels at small-batch grinding with a sense of control that’s less about uniformity and more about intentional texture. You avoid overheating through short grinding bursts, you manage particle size through targeted grinding and optional sieving, and you preserve aroma by grinding just before brewing. The use of a granite or basalt mortar provides the stability and power needed to press the beans into smaller fragments without needing electricity. The pestle’s shape and weight help you maintain a steady pace, which is essential when your aim is to coax out nuanced flavors rather than mere quick extraction. Across the spectrum of techniques covered in this chapter, the mortar and pestle remains a strong choice when you want to connect with your coffee in a hands-on, artisanal way. It is a reminder that great coffee can emerge from simplicity, a little friction, and a lot of care.
External resource for deeper exploration: https://www.lastaforest.com/grinding-coffee-in-a-mortar-and-pestle/
The Sharp, Simple Grind: Mastering Coffee Grounds with a Kitchen Knife When a Grinder Isn’t Handy
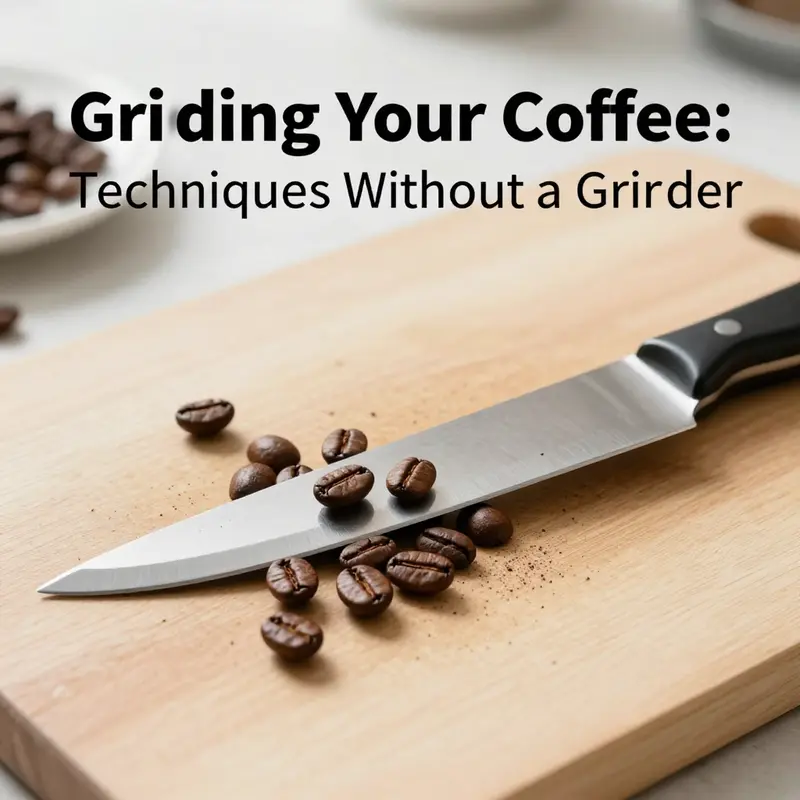
The moment you realize you forgot or misplaced your coffee grinder can feel like a small personal tragedy, especially when the morning demands a quick, comforting cup. In kitchens around the world, people reach for a familiar tool to improvise. A kitchen knife, a sturdy blade, and a calm, deliberate grip can become an unlikely ally in the quest to grind coffee beans without a dedicated grinder. This chapter does not pretend to rival the precision of burr grinders or the efficiency of electric mills. What it offers is a practical, thoughtful approach to producing usable grounds when the clock is ticking and a proper device sits out of reach. The goal is to harness a simple, controllable action—crushing and grinding with the broad plane of a blade—while preserving as much aroma and character as possible. A well-executed knife grind can service a French press or drip coffee with a satisfying, if imperfect, cup and can be a bridge to a better brew when the ideal tool is unavailable.
Before diving into technique, it helps to frame the stakes. Coffee grounds are a delicate balance of surface area, particle size, and moisture. Grind size affects extraction: too coarse, and flavors under-extract; too fine, and extraction surges, often bringing bitterness or a slurry. The goal with a knife is not uniformity on a burr-scale but practical consistency that suits the brew method at hand. A kitchen knife method shines when you need a coarse to medium grind for French press or a medium grind for a classic drip. It is not designed to deliver espresso-grade fineness or the immaculate uniformity of a scientific grind. Yet it does deliver a real cup in moments when you would otherwise forego fresh grounds altogether.
The first step is choosing the right knife. A wide, heavy chef’s knife or a sturdy bread knife provides the most reliable plane for crushing. A thin, sharp paring knife, even though it seems nimble, lacks the mass and broad surface needed to produce controlled, even pressure. The goal is to press, not to slice. The blade should be treated as a flat, broad surface that can transfer steady force into the beans without relying on fast, high-powered motion. With that in mind, prepare your workspace as a sanctuary of calm. Clear the counter, gather a towel to protect the surface, and keep a quiet rhythm. A hurried or careless motion is the surest route to inconsistent grounds and, more troubling, potential injury.
The safety framework around this method cannot be overstated. Beans are hard, and even a well-placed forceful impulse can bounce the blade or slip. You must keep fingers well clear of the blade’s path. The blade’s edge is not for slicing; it’s the flat face that does the work. Place the knife flat on the board, edge facing down, with the blade’s broad side toward the beans. A thick, clean towel or a square piece of parchment under the board helps keep the knife from sliding and contains any scattered fragments. The grip should be firm but steady, allowing you to apply pressure without feeling the knife slip away. You will be performing a controlled crushing, not a chop, and the motion must stay within a predictable plane. As with any tool, the body should stay relaxed, arms aligned, and wrists loose enough to avoid fatigue that could compromise technique or safety.
The actual grinding process hinges on a simple, practical sequence. Begin by transferring a small pile of beans to a safe, stable spot on your cutting board. The pile should be sufficient for your intended brew—perhaps a handful for a couple of cups or a little more for a stronger morning ritual. The first contact is a firm downward press with the palm pressing on the knife’s handle. The broad flat of the blade contacts the beans, kneading them into rough fragments. The sensation is tactile: the beans crack, then buckle, then crumble. This moment of contact matters because the grind’s texture begins here and will set the stage for extraction later. If the beans resist or you notice large halves lingering, rotate the pile slightly and apply another controlled press. The aim is not to crush every bean to powder in a single motion but to arc toward a more broken-down texture without sacrificing control.
Once you’ve created several broken fragments, the carving continues with a careful, rhythmic motion. After the initial crush, gently pull the knife toward you while maintaining steady pressure. This pulling action helps to break the larger fragments into smaller pieces and introduces a subtly translational grind, gradually increasing the surface area exposed to the blade. It’s important to keep the blade flat and stable, preventing slips that would jeopardize safety or disrupt the grind’s uniformity. As you work, observe the texture visually and by touch. You should be aiming for a spectrum that leans toward coarse to medium, depending on the brew you intend. For a French press, the texture can stay chunkier; for a drip, you will want a finer, more uniform medium grind. It’s worth noting that achieving the same uniform powder you’d get from a burr grinder is unlikely. The blade method yields a distribution with more coarse and mid-sized pieces. That’s not a failure—it’s a trade-off, a practical compromise that still preserves the essential oils and aromatics that define fresh coffee.
The next phase is texture assessment. Periodic checks matter because grind size is the difference between a luminous cup and a muddled one. A quick flick of the wrist to inspect a pinch of the ground coffee can reveal insights. If you see a lot of dust or powder, that’s a sign you’ve reached a finer texture than a French press requires. If you encounter stubborn larger chunks, you may need to repeat the pressing and pulling sequence, moving the blade slightly and rotating the pile to expose more surface area to the broad plane. The eye and the hand must work in concert here. A thorough test will guide you to a practical texture: not perfection, but practical, consistent enough for the intended brew. In the absence of a sieve, you can gently spread the grounds on a light-colored surface and look for uniformity in particle size. This visual cue, though not precise, helps you calibrate the technique and the amount of pressure you apply.
A note on heat is essential. The knife method, especially when performed with deliberate, controlled pressure, generates far less heat than a high-speed blender or a robust hand grinder. This is favorable because heat can degrade the delicate oils and aromatics that give coffee its character. Yet prolonged sessions can warm the grounds slightly, altering the aroma. If you’re grinding a larger batch, take brief pauses. Let the coffee rest a moment and breathe. This short intermission can help preserve essential oils and prevent a chalky or nutty aftertaste that often accompanies overworked grounds. Hydration of the bean’s interior—the moisture that breathes through the bean’s porous matrix—remains a quiet player in this process. The knife’s plane, applied with calm, deliberate pressure, nudges those volatile compounds into the open, where they await the hot water for a lively extraction.
The practical implications of this method extend beyond the immediate cup. With practice, you can develop a consistent approach that yields reproducible results for common brewing methods. If your goal is an unfiltered, robust cup, you can maintain a coarser grind that lets oils surface slowly and a bloom of aroma percolate through the brew. For drip coffee, a medium grind is achievable with careful, incremental work. You might not hit the exact uniformity of a scale-guided burr process, but you’ll avoid the pitfalls of overly coarse grounds that lead to weak flavor and under-extracted profiles. The beauty of the knife technique lies in its immediacy and its accessibility. It does not demand a heavy investment, rippling into a broader philosophy: coffee should be approached with an eye for the fundamentals of freshness, texture, and extraction, rather than an obsession with perfect equipment.
One of the most practical adjustments you can make to optimize the outcome is to lean into the method’s imperfection. When you’re bound by a non-ideal grind, you adapt the water and brew time to compensate. A French press, which tolerates a rougher grind and longer contact with water, provides a forgiving home for a blade-ground batch. You can extend the steeping time gently, ensuring that the extracted flavors have a chance to emerge despite the lack of a uniform grind. Conversely, when aiming for drip coffee, you may find you need a little more finesse and a tad shorter contact time to avoid a muddy cup. It’s a dance of texture and timing, with the blade acting as a gentle partner rather than a strict choreographer. The method invites experimentation, a scientific curiosity about how small changes in pressure, rotation, and duration influence the final cup. Coffee is a nuanced beverage, and a blade grind invites you to feel your way toward balance rather than blindly chasing sameness.
Another practical consideration is batch management. If you anticipate brewing multiple cups, you can prepare a modest amount at a time. Grinding too many beans at once can overwhelm the sensory and tactile feedback you’re using to judge texture. Working in batches gives you room to adjust, to test, to compare, and to refine your technique without losing control. When you regrind in smaller portions, you can reduce dust and over-pressurization of the grounds, preserving a more consistent extraction profile across the batch. In the absence of a sieve, a light, patient shaking of a flat plate can help separate visibly finer particles from larger fragments. Use your eyes to separate and rework only the larger chunks, applying another short series of presses and pulls to reintegrate them with the rest of the batch. The act of reworking is not punishment; it’s a respectful nod to the bean’s integrity and to the artistry of the process when equipment is limited.
As you become more confident, you might find yourself gravitating toward a more deliberate ritual. The process, though simple in its physics, can become a meditative habit. The sound of the blade resting on the board, the soft thud of the beans cracking, the slow travel of the knife as you pull and rotate—all of these sensory cues help you enter a focused state. The repetition of the motion can cultivate a sense of mastery in a kitchen that often feels rushed. In this sense, the kitchen knife method is less about achieving professional precision and more about nurturing an intimate connection with your morning ritual and with the coffee you savor. The aim is to preserve as much nuance as possible given the tools at hand, while maintaining safety and practicality.
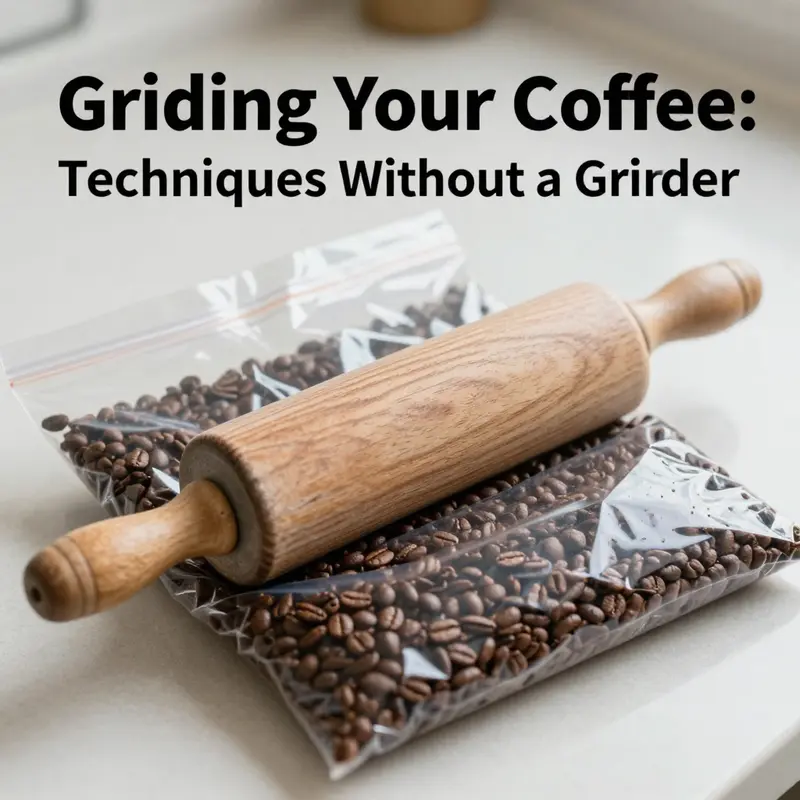
A final note on the broader context. This chapter sits within a larger conversation about grinding coffee without a dedicated grinder. Earlier methods—such as using a rolling pin with a plastic bag, a mortar and pestle, a kitchen knife, or a cautious pulse operation with a blender or processor—each offer a distinct blend of texture, control, and ease. The kitchen knife technique shares DNA with those approaches; it emphasizes control, tactile feedback, and the mindful application of pressure. It also reinforces a fundamental principle that threads through every method: grind just before brewing. Ground coffee oxidizes quickly, and its aromatic compounds fade with exposure to air. The moment you finish grinding, you should proceed to brewing in order to capture the peak of flavor and aroma. This practice remains true whether the grind comes from a burr grinder, a blade, or a rolling pin. The more you respect the delicate nature of the coffee you’re about to extract, the more you’ll appreciate the chapters that describe how to maximize aroma and flavor when equipment is limited.
In closing the practical arc of this technique, remember that the blade method—while not the most precise or efficient—delivers a usable, satisfying outcome when grinding gear is unavailable. It requires attention to safety, a measured touch, and a willingness to adjust for texture and brew method. With patience, you’ll discover that the kit of a kitchen knife, a towel, and a calm kitchen counter can transform a moment of constraint into an opportunity for experimentation and learning. The best cup you brew from this method will come not from chasing a perfect particle size, but from embracing the textures you produce, tuning your water and time to suit those textures, and paying close attention to aroma as the hot water bathes the grounds. This approach honors both the craft of coffee and the ingenuity of home improvisation—and it remains a viable, thoughtful option when a grinder simply isn’t at hand.
Final thoughts
Understanding how to grind coffee beans without a dedicated grinder can significantly impact the quality of your beverages, especially in a business setting where flavor consistency is crucial. Each method discussed has unique advantages, from the rolling pin technique that captures a consistent medium-fine grind to the precision of the mortar and pestle for finer grinds, and the quick approach of using a kitchen knife for emergencies. By mastering these techniques, business owners can ensure a high-quality coffee experience for their customers, reinforcing the foundational importance of freshly ground coffee in the brewing process.