
Understanding how to brew coffee from whole beans can significantly impact the quality of the beverages you serve in your business. Choosing the right method not only enhances flavor but can also be a cost-effective solution that captures the essence of quality without complicating operations. This guide will explore three effective coffee-making methods: cold brew, French press, and the simple tea bag method, each with its own unique advantages. By the end of this article, you will have a clearer insight into how to produce high-quality coffee that delights your customers while fitting your budget and operational style.
Cold Brew Chronicles: The Gentle Art of Transforming Coffee Beans with Cold Water

The charm of cold brew lies in the quiet, almost patient drama of transformation. It begins with the humble coffee bean, harvested and dried, then roasted to reveal its personality. In hot brewing, heat rushes through the bean, coaxing out certain flavors while muting others. In cold brew, time does the work differently. Water at cool or room temperature surrounds the ground coffee and, with patience, coaxes out sweetness, body, and nuanced acidity that often stay hidden in faster methods. The result is a concentrate that invites you to tailor strength and flavor with simple changes to dilution and additions. This chapter unfolds that process as a practical, reflective craft, grounded in what many home brewers have found to be reliable, affordable, and surprisingly forgiving. It’s the art of letting the coffee bean reveal its best self when you give it time, the gentlest possible heat, and the freedom to reveal its subtler notes.
Choosing the beans is the opening move, and it matters more than many assume. For cold brew, the bean’s roast level and origin shape the entire experience. Medium-light to medium roasts tend to preserve a brightness that cold extraction embraces rather than dulls. Beans with fruity or citrusy characteristics—think certain Ethiopian profiles or Kenyan varieties—often emerge with a lively sweetness that can shine when not overwhelmed by heat. Yet there is nuance in the palate for a balanced, nutty or chocolatey middle, which lines up nicely with cold-brewed coffees from regions like Yunnan or other balanced, approachable beans. In practice, many home brewers discover that labeling beans “for pour-over” or “single-origin” is a helpful hint toward cold brew compatibility. The goal is not to chase a single flavor stereotype but to invite a spectrum of gentle sweetness and clarity that cold water unlocks over time.
Once you’ve selected the beans, the grind becomes the second decisive act. A coarse grind—think the texture of coarse sea salt or damp sand—prevents over-extraction and keeps the final brew clean and sediment-free. A finer grind, even briefly, can muddy the liquid and introduce a muddy texture or bitterness that contradicts the smooth, expansive feel cold brew can offer. If you don’t own a dedicated grinder, a sturdy kitchen blender or a simple food processor can do a passable job, as long as you don’t overdo it. The key is to aim for a consistency that resembles rough sand rather than flour, resisting the urge to imitate espresso grind unless you intend to switch methods later in your practice. The choice of equipment influences the feel of the process, but it shouldn’t become a barrier to getting your hands into the coffee you want to drink.
With the beans ground, the next move is to balance coffee and water with a reliable ratio. A commonly recommended range is 1:12 to 1:15, coffee to water. That means about 40 grams of coffee for 480 milliliters of water, or 50 grams for 600 milliliters, depending on how strong you want the concentrate. The exact numbers can flex a little depending on the beans’ strength, the grind, and your taste. Cold water or room-temperature water are both acceptable; cold water tends to pull out sweetness and reduces any chance of early bitterness, especially if the coffee has a bright profile. It’s helpful to stir thoroughly after combining the grounds and water to ensure every particle is wetted, then seal the container tightly so the aroma doesn’t escape, preserving the delicate compounds you want to taste later. The act of sealing is not merely practical; it’s a small ritual that protects the aromatic complexity that cold brew preserves so well.
Now the coffee must rest. Steeping in the refrigerator for 12 to 24 hours is the standard tempo, and the longer you wait within that window, the more pronounced the extraction becomes. A common sweet spot lies around 18 to 24 hours, where the balance between body and clarity feels just right for many palates. Temperature matters here too. Keeping the mixture at a steady cool level—roughly 0 to 5 degrees Celsius (32 to 41 degrees Fahrenheit)—helps the slow extraction unfold evenly. The cold environment curtails the harsher notes that can sometimes slip into a brew left too long at higher temperatures, and it encourages a smoother, more cohesive mouthfeel. The patience shown during this phase is not passive; it is a deliberate, quiet rehearsal of flavor that pays off when you finally pour your first glass.
Filtration comes next, and it’s a quieter moment of precision. After the steep, the grounds need to be separated from the liquid so the final drink remains clean rather than gritty. A simple coffee filter, cheesecloth, or a fine-mine sieve will do, with a paper filter or a reusable metal filter yielding the clearest result. If you used a mesh bag, simply remove it and squeeze gently to extract any remaining liquid. The aim is a smooth, glassy liquid with minimal sediment, because the texture affects both the perception of flavor and the ease of drinking in large sips on a hot afternoon. Filtration is not a punitive step; it is a gentle restoration of the liquid to the clarity your palate expects from a refined cold brew experience.
Storage and serving are the practical endgame of this method, and they are where the experience becomes personal. Once filtered, transfer the cold brew concentrate to a sealed bottle and refrigerate. It will stay fresh for up to five days, a forgiving window that rewards planning and simple organization. When you serve it, you can go straight over ice for a bright, refreshing drink or dilute it with water or milk to taste. A common approach is a 1:1 ratio of concentrate to water or milk, with some people liking a little more dilution to keep the drink easy to sip on warm days. The concentrate also acts well as the base for an iced latte: mix in a splash of milk or oat milk and enjoy the drink with a light froth. If you crave subtle spice and aroma, a dash of vanilla, a hint of cinnamon, or a whisper of citrus zest can be added during steeping for a gentle twist that won’t overwhelm the underlying bean character. The versatility of cold brew, especially when you control concentration, is one of its most appealing traits.
People often ask what makes cold brew so approachable. The fundamental reason is temperature and time. By avoiding heat, cold brew minimizes bitterness and acidity that hot extraction can emphasize, and it tends to draw out natural sweetness and fuller body. The long steeping period allows complex sugars and aromatic compounds to unfold more gradually, revealing a smoother overall profile that many describe as reminiscent of tea in its gentleness, yet with the depth of coffee. This is not a universal verdict—preferences vary, and some days a bolder edge may be desired—but cold brew’s default mode is to stay approachable, easy to drink, and forgiving of minor missteps in measurement or timing. It’s precisely why a simple bottle left aside overnight can yield a ready-to-drink beverage that pleases both adventurous palates and those who simply want a familiar caffeine lift without the sharpness they sometimes dislike in hot brews.
Beyond the flavor, there is a practical economy to the method. A basic setup—a jar or bottle, a coarse grind, a reliable scale if you have one, and a clean filter—can produce a high-quality beverage at a fraction of the cost of frequent café visits. The technique rewards small adaptations rather than sweeping overhauls. If you grind more gently, you can push for brighter notes. If you extend the steep a little longer, you might glimpse a deeper, sweeter mouthfeel. If you adjust the dilution, you can tailor the strength for drinking straight, on the rocks, or as a base for a cold latte. The flexibility is liberating: you are not bound to a single, rigid recipe. You are learning the flavor language of your own kitchen—the dialect of your own palate scribbled across glass and ice.
A note on accessibility and affordability helps ground this exploration. The approach thrives on minimal equipment and low cost. While many guides emphasize specialized devices, the reality presented by home brewers is that one can start with almost nothing and still achieve a compelling result. A coarse grind can be achieved with a robust blender if no grinder is available, and a simple jar can stand in for more elaborate equipment. The core principle remains: let the beans and water converse slowly, and then listen for the telltale signs of a well-balanced extract—the sweetness that lingers, the soft mouthfeel, and the clean finish that invites the next sip rather than demanding a palate-cleansing chaser. The path to a great cold brew is not a quest for the most expensive tool, but a patient dialogue with the ingredients and the process.
For those who want to build confidence over time, the small, incremental steps matter most. Start with a basic 1:12 ratio, a coarse grind, and a 12-hour chill steep. If the result reads too flat, nudge the ratio toward a touch more coffee or push the steep time to 18 hours. If the brew tastes too bright or young, consider a slightly longer steep or a coarser grind to reduce perceived harshness. If you crave more sweetness, you might select beans with a fruit-forward or caramel-like profile and adjust the dilution to emphasize that sweetness. The beauty of this method is that you can learn this language by tasting and adjusting, rather than by following a rigid script. With practice, you’ll begin to anticipate how your chosen beans respond to cold-water extraction, and you’ll become more fluent in producing the cup you want on any given day.
The broader takeaway is clear: cold brew isn’t a gimmick or a one-note alternative. It’s a legitimate brew method that aligns with how many people want to drink coffee—soft, approachable, and adaptable to different occasions. Its simplicity invites a reliable routine, yet its flexibility invites experimentation. It’s a bridge between the economy of a low-cost setup and the artistry of flavor, between the quiet patience of the kitchen and the brighter, more social moments when you share a glass with a friend or savor a slow morning routine. In that sense, cold brew is not merely a method; it is a mindset about coffee: that flavor can emerge gracefully from a patient process, and that everyday ingredients can yield a remarkable, tailored experience with minimal fuss.
For readers who want to explore further, a detailed expert-backed guide offers a deeper dive into bean types, precise ratios, and storage practices that refine what you’ve learned here. You’ll find more nuance in bean selection, grind considerations, and post-brew adjustments that help you optimize your cold brew over time. If you’d like a trusted external resource to guide your next step, see FrontStreet Coffee’s comprehensive cold brew guide for home practice and refinement. FrontStreet Coffee cold brew guide.
In closing this chapter, remember that cold brew is less about mastering a rigid protocol and more about embracing the slow, deliberate rhythm of extraction. The bean’s potential unfolds in the quiet space between water and time. Your job is to listen, adjust, and keep tasting. With patience, the simple act of soaking ground coffee in cool water reveals a smooth, low-acidity cup that can be enjoyed straight, diluted, or as the foundation for a café-inspired iced drink. The method is as much a craft as it is a routine, and like all good crafts, it rewards curiosity, consistency, and a willingness to refine what you pour into a glass.
Rich, Low-Cost Coffee from Whole Beans: Mastering the French Press
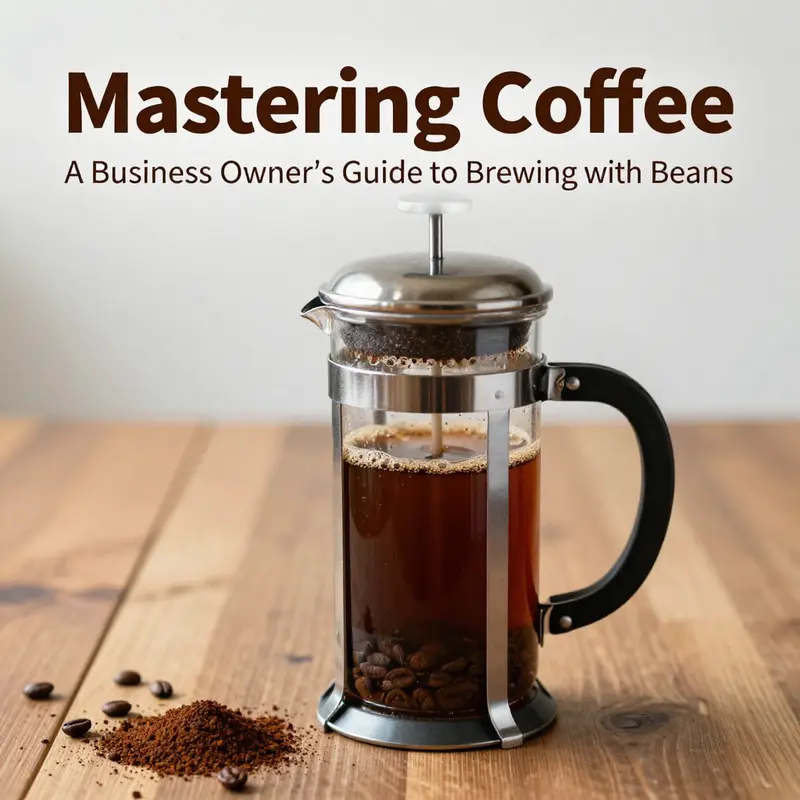
French Press brewing lets whole beans shine. It is a simple, affordable way to extract a full-bodied cup. With minimal tools and a little attention, you can turn whole beans into coffee that feels deliberate and satisfying. This chapter walks through the practical steps and the reasoning behind each choice. The goal is not just to follow a recipe. It is to understand how grind, water, time, and technique interact so you can adapt to different beans and tastes.
Start with the bean. Freshness matters. Whole beans keep their oils and aromas far longer than pre-ground coffee. Buy beans roasted within the last few weeks and store them in a cool, dark place. A simple airtight container away from heat and light is enough. Avoid freezing and refrigerating unless you buy in large batches; constant temperature shifts draw moisture and flavors out.
Grind size is the first technical variable you can control. For a French Press, a coarse grind works best. The grounds should look like coarse breadcrumbs, not sand. Coarse particles extract more slowly and sit neatly on top of the metal mesh filter. If the grind is too fine, fines will slip through and cloud the brew. That makes the cup gritty and prone to over-extraction, which tastes bitter and hollow.
You do not need an expensive grinder to get a usable coarse grind. A basic hand burr grinder gives better consistency than a blade model. If you do not have a grinder, a mortar and pestle or a sturdy rolling pin on a sealed bag of beans works in a pinch. A kitchen blender can also work if you pulse the beans in short bursts. The aim is consistent coarse particles, not dust.
Measure coffee and water by weight if you can. Scales are inexpensive and precise. If you lack a scale, tablespoons can work, but be aware that volumes vary by bean size and roast. A reliable starting ratio is 1:15 to 1:18 coffee to water by weight. For an 8-ounce (240 ml) cup, that translates to roughly 15–18 grams of coffee. For a larger 1-liter press, adjust the amounts proportionally. Once you begin, tweak the ratio toward stronger or lighter cups to match your taste.
Water quality and temperature shape extraction and flavor. Use filtered water when possible to avoid the minerals and flavors that can interfere with the coffee. Heat water to just below boiling. The target temperature sits around 90–96°C (195–205°F). If you do not have a thermometer, bring water to a boil then let it rest for about 30 seconds before pouring.
Preheat the French Press and your serving vessel. Pour a little hot water into the empty carafe, swirl it, and discard. That keeps the brew at the right temperature while it steeps. A cold carafe cools the water and reduces extraction, yielding a thin cup.
Add the coffee grounds to the warmed press and distribute them evenly. Pour a small amount of water first — just enough to wet the grounds. This step, sometimes called blooming, allows trapped gases to release and primes the grounds for even extraction. After about 30 seconds, pour the rest of the water in a steady, circular motion to ensure full saturation.
A gentle stir with a non-metal spoon helps mix the grounds and water without breaking particles. Place the lid on the carafe with the plunger pulled up. Let the coffee steep for roughly 4 minutes. This is a reliable middle ground for many single-origin and blend beans. Shorten the time slightly for lighter roasts or more delicate flavors. Extend it a bit for darker roasts or if you prefer a heavier body. But be cautious: steeping too long increases bitterness.
When the timer reaches four minutes, press the plunger down slowly and evenly. Use steady pressure and avoid forcing the mesh through the grounds. A slow press prevents fines from moving through the filter and reduces agitation that can stir up sediment. If the plunger feels unusually resistant, ease up and press in stages. A gentle, controlled press keeps the cup clean and smooth.
Serve immediately after pressing. Leaving coffee in contact with grounds causes continued extraction and bitterness. If you cannot serve all the coffee at once, transfer it to a thermal carafe. That preserves temperature without over-extracting. Pouring into individual cups right away preserves the best aroma and balance.
Clean the French Press after each use. Coffee oils and tiny grounds cling to the mesh and glass. Rinse everything under hot water and remove grounds promptly. Residual oils quickly turn rancid and affect future brews. Once or twice a week, disassemble the plunger and give the filter a thorough scrub. This simple habit keeps every cup tasting fresh.
Understanding the why behind these steps helps you troubleshoot and improve. If your coffee tastes sour or weak, you may be under-extracting. Try a finer grind, a slightly longer steep time, or a higher coffee-to-water ratio. If it tastes bitter or overly astringent, that points to over-extraction. Use a coarser grind, shorten the steep time, or reduce coffee dose slightly. Balance comes from small adjustments.
Texture is part of the French Press appeal. The metal mesh filter allows oils and micro-particles to pass into the cup. Those elements add body and mouthfeel. If you prefer a cleaner, clearer cup, decant the coffee after pressing through a paper filter. But many French Press enthusiasts value that fuller texture. Embrace it if you enjoy a richer sip.
Experiment with brewing rhythm. Pouring technique affects extraction. Some home brewers use a two-stage pour: a small amount for blooming, then the remainder after thirty seconds. Others prefer a continuous pour to maintain temperature. Stirring can be minimal or vigorous; slight agitation helps extract more evenly, while heavy stirring can encourage fines to move toward the mesh filter. Try different rhythms until the cup matches your ideal.
Bean selection drives flavor possibilities. Light to medium roasts reveal origin character, acidity, and complex aromatics. Dark roasts emphasize roast flavors and body. If you enjoy nuanced tasting notes, start with light or medium roasts. If you prefer robust, chocolaty cups, a darker roast will suit you. Always match grind and brew time to the roast level to get the best balance.
For cost-conscious brewing, the French Press offers advantages. You avoid recurring costs for paper filters. A basic press can last years with proper care. A modest hand grinder yields better consistency than disposable filters cost over time. If you want to stretch your budget, buy whole beans in larger bags from reliable sources and store them correctly. Grinding at home preserves aroma and flavor, so you get more value per purchase.
Adapt the method to small or large batches. For a solo cup, use a small press and scaled-down weights. For groups, multiple presses or a larger press make brewing efficient. If you brew for many people, consider preparing several presses in parallel and staggering them so each cup is pressed right before serving. Avoid pressing everything and leaving it in the carafe; fresh-pressed coffee tastes best.
Beyond technical control, build a practical routine that fits your day. Measure beans the night before if mornings are rushed. Clean the press immediately after breakfast so it is ready for the next brew. Keep a simple scale and kettle in a consistent spot. Small conveniences reduce friction and encourage consistent results.
When you first learn, keep variables simple. Use a single origin or consistent blend for a week and experiment with one variable at a time. Change only grind size, or only brew time, and note the difference. Tasting side-by-side reveals subtle shifts that you may miss otherwise. Keep a short log of ratios and times. Within a few trials you will find a repeatable routine that fits your taste.
The French Press also lends itself to creative variations. Try a slightly higher coffee dose for a velvety concentrate, then dilute with hot water for an Americano-style cup. For flavored variations, add a small cinnamon stick or a sliver of citrus zest to the grounds before pouring. These additions work best with medium roasts and mild spices.
You can also adjust temperature to coax flavors out of delicate beans. A slightly lower water temperature highlights floral and fruity notes. Higher temperatures emphasize sweetness and body. Temperature is a tool for revealing different aspects of the same bean. Keep changes modest and taste carefully.
Storage and freshness continue to matter long after brewing technique. Keep unopened bags sealed and stored in a cool place. Once opened, move beans into an opaque, airtight container. Use them within two to four weeks for the best taste. Whole beans lose volatile aromatics gradually, and ground coffee fades faster.
If you are on a tight budget, combine simple hacks with the French Press. Use a basic manual grinder or an inexpensive electric burr grinder. Purchase beans from value-friendly sellers and roast levels that suit your preference. Reuse the grounds in the garden as compost. The French Press lets you make quality coffee without high-end gear.
Finally, use your palate as the guide. Brewing parameters should serve the flavor you enjoy. If that means a slightly stronger or milder cup, adjust accordingly. The French Press is forgiving and direct. It teaches you the fundamentals of extraction in a tactile way. Each batch informs the next.
For a visual demonstration and additional guidance, consult a trusted brewing guide that illustrates the French Press steps and timing: https://www.bodum.com/en-us/brewing-guide/french-press-coffee/
Mastering French Press brewing transforms whole beans into a deliberate, cost-effective daily ritual. With consistent beans, a coarse grind, appropriate water temperature, and a steady four-minute steep, you will extract rich, satisfying coffee. Tweak the ratio and steep time to match your taste. Keep the press clean and your beans fresh. Over time you will learn small adjustments that make a big difference. The method is simple, but the results can be remarkably nuanced. Embrace the process and enjoy the coffee.
Sachet Simplicity: A Gentle, Low-Cost Path to Coffee from Whole Beans

In many kitchens, coffee rituals get complicated with equipment, timers, and a belief that great flavor demands fancy gear. But for those who want a straightforward, affordable way to turn everyday beans into a satisfying cup, a simple tea-bag method offers a humane entry point. It treats coffee like a mellow infusion rather than a demanding espresso chase. The approach centers on using whole beans ground coarse enough to river through a makeshift sachet, then steeping in cold water to coax out flavor with minimal bitterness. This is not about theatrical technique; it is about accessibility, patience, and a respect for the bean’s natural character. When you can hold a jar, a cloth or tea bag, and water, you can craft a smooth, low-acid coffee experience that works in any season and with any budget. The beauty lies in the method’s restraint: a short list of ingredients, a few patient hours, and a result that can surprise you with how clean and balanced it tastes compared with some hot-brew approaches.
The core idea behind this tea-bag coffee method is not to reinvent extraction but to adapt it to a style that keeps things simple and forgiving. Cold-water extraction draws out a different spectrum of flavors than hot methods. It gradually unlocks coffee’s sweetness and reduces harshness, particularly for beans that might feel brash when brewed quickly with heat. The aroma blooms as soon as the jar is opened after steeping, and what remains in the jar is a clear, smooth liquid with minimal tannic bite. It is the kind of cup that can feel almost tea-like in its mood—cool, refreshing, and gently confident. If you have ever wondered whether you could enjoy a coffee without investing in an entire espresso rig or a cluttered home coffee station, this method is a practical answer. It invites a hands-on feel without demanding a precise scale, a specialized grinder, or a dedicated brewing vessel.
What you need to begin is a humble setup that lives in a kitchen drawer or a pantry shelf. Start with whole coffee beans, because freshness matters. The philosophy here favors grinding just before you brew, so the oils and aromatics stay lively. Do not be tempted to purchase pre-ground coffee for this approach; the purpose is to maximize flavor retention and minimize staling from exposure to air. A coarse grind is essential: aim for something akin to rough sea salt, with crystals that are chunky enough to slow the passage of water through the sachet but not so coarse that extraction stalls. If your home equipment is limited, you can improvise a grinder with a rolling pin or a sturdy bottle. The key is to disturb the beans enough to release their scent and surface area, without pulverizing them into a flour-like dust that clogs the bag or cloth. Precision in grind size matters here, but it is not the same degree of exactness demanded by espresso or Turkish coffee. The goal is to create a workable surface area for a slow, even extraction over many hours.
Next comes the sachet. A reusable tea bag works beautifully when you can secure a neat, tight hold on the grounds. If you don’t have a tea bag, a clean muslin cloth works just as well. The fabric should be washed and dried before use to avoid any residual flavors from previous contents. Place roughly 15 to 20 grams of ground coffee into the bag or cloth; this amount can yield a robust cup when diluted or a stronger concentrate for later mixing. Tie the pouch tightly with a string or elastic to prevent any loose coffee from escaping into the brew. The principle here is simple: you want the liquid to surround the grounds, not chase them through tiny gaps. A properly sealed sachet keeps the process neat and reduces the risk of particulate matter in your final drink. It is a modest but effective barrier that helps you avoid the mess that can come with loose grounds floating freely in the water.
With your sachet prepared, the next step is to immerse it in water. Use a clean jar or a tall, wide-mouthed container to give the sachet ample space to expand and unfurl. Fill the container with cold, filtered water. A practical range is roughly 500 milliliters to one liter, depending on how concentrated you want your final beverage to be. Cold water is deliberate here; it slows extraction and favors a smoother, more nuanced profile. If you are using room-temperature water in warmer months, keep the container in a cool spot or refrigerate it after the initial mixing. The difference between room temperature and refrigeration is subtle, but it can help preserve aromas during hotter days when you want to avoid the risk of heat accelerating flavor loss. Submerge the sachet completely so every particle has a chance to release its character. The first impression after submersion is a quiet, almost medicinal scent that gradually deepens as compounds begin to dissolve into the water.
The steeping period is where patience pays off. In many households, 12 to 24 hours is the sweet spot. Shorter times can yield a lighter flavor, but they may still be pleasant if you enjoy a more subtle cup. If you prefer a stronger result, you can extend the steeping window, factoring in your taste preferences and the intensity of the particular beans you’ve chosen. The container should be covered to preserve aroma and prevent dust or other scents from infiltrating the brew. During this time, a gentle shake every few hours can help the extraction proceed evenly by redistributing the grounds within the sachet. Do not overdo it; the aim is to balance agitation with stability so you do not flood the bag or risk tearing the fabric. The patience you employ at this stage rewards you with a cup that doesn’t taste thin or hollow. Instead, you experience a depth that hints at chocolate, a little sweetness, and subtle fruit tones that linger in the finish rather than assaulting the palate with sharp acidity.
When the steeping is complete, the moment of separation is straightforward. Remove the sachet and let it rest briefly as the liquid settles. The grounds will have sunk to the bottom, leaving a clean brew above. Pour the liquid into a fresh container, avoiding the sediment. You now have a ready-to-drink cold-brew concentrate—an elegant, low-acid, smooth beverage that can be enjoyed as is or diluted to your preferred strength. A typical serving is to dilute with water or milk to taste, especially if you are preparing a larger batch for a group. Some people enjoy the concentrate straight over ice, appreciating the way the coolness accentuates the gentleness of the flavor. Others prefer a warmer cup, which you can achieve by gently reheating a portion in a microwave or on the stove. The versatility is part of the appeal: a single batch can carry you through a day with multiple serving styles, from over-ice refreshment to a comforting hot mug during a cooler morning.
The flavor profile of this tea-bag, cold-brew approach reflects its extraction dynamics. Because the brew uses cold water, the process emphasizes sweetness and body rather than the high-toned brightness that can accompany hot brew methods. You are more likely to notice caramel notes, cocoa-like richness, and a rounded mouthfeel, with a lower perception of bitterness. This makes the method attractive for beans that may carry bold flavors when roasted darkly, since the cooler window allows these characteristics to emerge more cleanly without the edges numbing the palate. The method also tends to produce a cup with lower perceived acidity, which can be more approachable for those who are sensitive to tang or for those who want a coffee that can be enjoyed at different times of the day without a jolt of acidity. It is not that this approach eliminates all brightness or complexity; rather, it presents them in a gentler, more approachable form that can serve as a foundation for exploring other techniques later on.
The financial and practical benefits of this method are hard to overlook. You can start with a minimal investment and reuse components across many batches. If you already own a jar, a cloth, and a way to grind beans, you can produce multiple liters of coffee at a fraction of the cost of some other brewing setups. The ground coffee that remains after a batch can often be repurposed for compost or used as a fragrant addition to certain recipes or kitchen experiments, giving a small but meaningful extension to its usefulness. The overall expense for a single batch stays remarkably low. If you consider the cost of the grounds and water, plus a teabag or cloth that you can reuse for many batches, you will find the total expense easily under a few dollars per full liter prepared. This cost efficiency is not just about savings. It makes the practice accessible to people who want to experiment with coffee at home without feeling locked into a particular equipment purchase or a long shopping list. The method aligns well with a broader philosophy of mindful, low-waste coffee making that respects the bean in its natural state and avoids the distractions of heavy, specialized gear.
To keep the practice sustainable and adaptable, think in terms of small, repeatable steps rather than a single, rigid ritual. Grind fresh beans just before you brew, keep your beans in a cool, dry place to preserve their oils, and choose what you roast with care to match your flavor goals. Light to medium roasts often lend themselves well to this technique, revealing a smoother acidity and a more nuanced aroma when steeped cold. You may find that different beans yield distinct personalities even within the same method. A citrus-forward coffee might brighten as it sits in cold water, while a chocolatey, nutty profile can deepen with time. The flexibility of this approach invites ongoing experimentation without the risk of wasting ingredients. If you want to push the envelope, you could experiment with slightly warmer water during the initial steep, or with a longer soak, to discover if that bean’s unique balance of sweetness and aroma shines through under different conditions. The key is to monitor changes gradually so you can track what you prefer.
As you become more comfortable with the tea-bag method, you will notice that it not only lowers the barrier to entry but also reframes how you think about coffee quality. It makes you attentive to the bean’s natural character rather than only chasing intensity. You may discover that a lighter roast reveals a brighter, fruitier edge when steeped in cold water, whereas a darker roast yields a lush, cocoa-forward profile with a velvety finish. The method also reduces the likelihood of over-extraction bitterness, since the cool environment and shorter contact time with heat limit harsh compounds from dominating the cup. This can be a relief for beginners who have encountered astringent or burnt flavors in other home-brewing contexts. At its best, this approach teaches patience, fosters mindfulness about timing, and reinforces the idea that excellent coffee does not always require elaborate equipment or expensive beans. It can also be a comforting ritual that you look forward to share with a friend, a family member, or even a quiet moment with yourself, where a simple, well-made cup anchors the rest of the day.
For those who enjoy a bit more structure without losing the method’s simplicity, you can view this tea-bag approach as a foundational skill that provides a baseline for further exploration. Once you are comfortable with 12 to 24 hours of cold-steep extraction, you can begin to compare this method to other low-cost options such as straightforward hot brew or pour-over with basic equipment. The beauty of the tea-bag technique is that it remains forgiving while still offering a clear path toward better, more deliberate home brewing. If you ever decide to upgrade, you may choose to add a simple prop like a reusable metal or cloth filter for hot-brew styles. Yet the core merit of this approach remains: it is approachable, economical, and quietly capable of producing an excellent cup when given time and respect for the beans. In this sense, the tea-bag method acts as a compassionate mentor for novices and a reliable baseline for seasoned home brewers who want the comfort of a dependable, low-stress brewing process.
If you are curious to compare the experience with other minimalist methods, you will find that the tea-bag cold-brew approach aligns more closely with the spirit of patience and taste-first thinking. It offers a credible alternative to the more fussy, equipment-heavy routines that can complicate a daily coffee habit. The technique invites you to savor the bean’s intrinsic flavors rather than masking them with heat or excessive grind fineness. It rewards those who value simplicity, consistency, and sustainability as much as flavor. In short, this is not a quick fix to a morning jolt; it is a quiet invitation to explore coffee with a different tempo—one that rewards time, care, and a light touch.
As you finish your cup, take a moment to reflect on how your choice of preparation influences what you taste. The tea-bag cold-brew method is a reminder that coffee can be a gentle, familiar ritual rather than a race against time or a chase for the strongest possible cup. It is also a reminder that great flavor can emerge from modest means when the process respects the ingredient and the palate. If you decide to document your experiments, you can keep notes on grind size, coffee weight, water ratio, steep time, and whether you diluted or enjoyed the concentrate as-is. This habit of mindful record-keeping helps you notice how small adjustments—like a minute difference in grind coarseness, a slight variation in water temperature, or a longer steep—shift the overall character of the brew. Over weeks, your preferences become clearer, and the method you started with becomes the starting point for more refined experiments rather than a fixed routine.
For readers who want to broaden their understanding of coffee’s broader landscape, consider exploring resources that discuss the science of extraction, the impact of roast level on flavor, and the relationship between grind size and surface area. While this chapter focuses on a specific, accessible technique, the larger conversation about coffee is rich with nuance and possibility. If you wish to look beyond home-brew basics, you can consult broader references about coffee flavor, brewing science, and the cultural traditions that shape how people around the world enjoy their daily cup. In the meantime, the sachet method provides a reliable, low-cost pathway into deeper exploration. It invites you to approach coffee with curiosity, patience, and a willingness to start from the simplest possible setup and a handful of well-ground beans. After all, great coffee begins with listening to what the bean wants to become in your cup, then honoring that by letting it steep at its own pace.
External resource for broader context: https://en.wikipedia.org/wiki/Coffee
Final thoughts
Each coffee brewing method offers unique benefits. The cold brew method is particularly advantageous for its smooth flavor and low acidity, making it ideal for various customer preferences. The French press delivers a full-bodied experience, perfect for coffee connoisseurs, while the simple tea bag method provides a quick and economical solution for those with limited resources. By incorporating these methods into your business, you can elevate your coffee offerings, attract a wider clientele, and establish a reputation for quality.