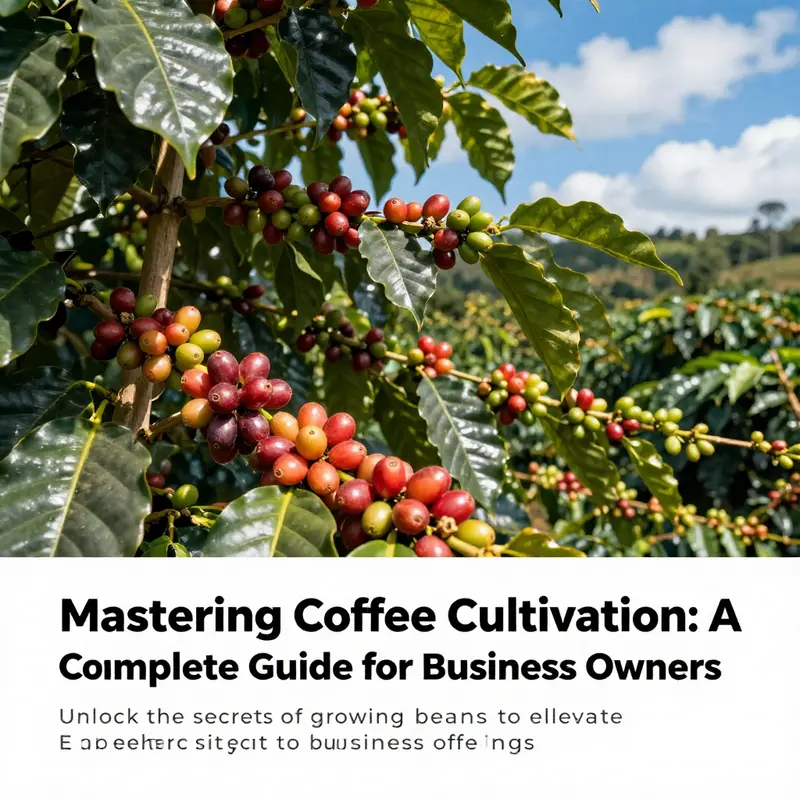
Growing coffee beans can be a lucrative venture for business owners looking to diversify their product offerings. Understanding the intricacies of coffee cultivation—from selecting the right variety to managing ongoing care—is essential for success. This guide provides a comprehensive overview, addressing five crucial aspects of coffee farming: choosing the right coffee variety, preparing the soil and planting site, seed preparation and sowing techniques, nursery management and transplanting, and ongoing care, pest control, and harvesting. Each chapter builds on the previous one, delivering a holistic view that empowers you to cultivate high-quality coffee for your business.
Variety Matters: Picking the Right Coffee for Your Climate, Market, and Goals
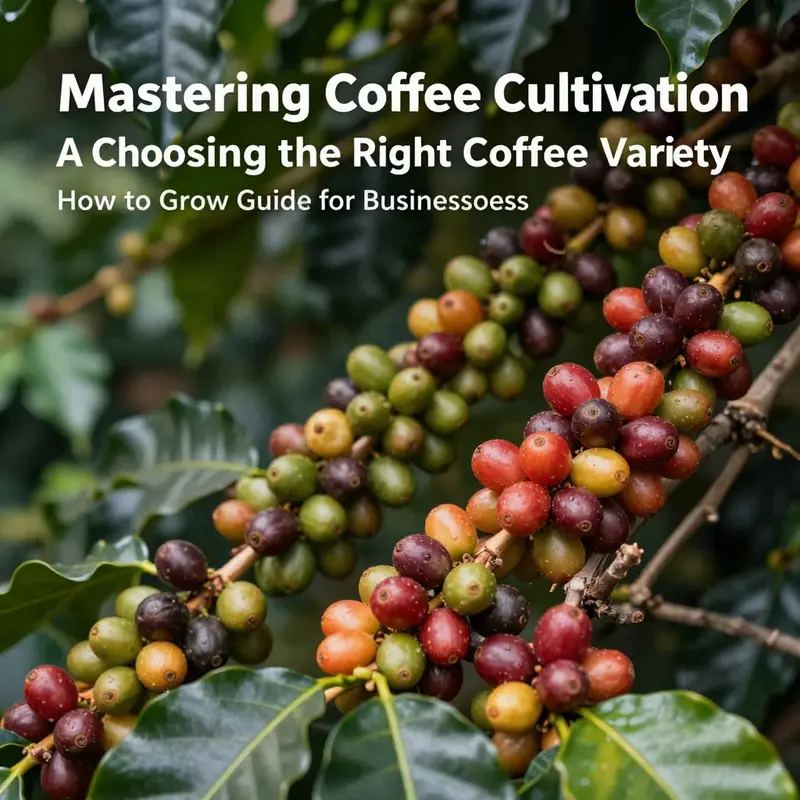
Choosing the right coffee variety sets the stage for everything that follows. From day one, the species and variety you select will determine the altitude, shade, soil, and labor required. It will also shape flavor, yield, and vulnerability to pests and disease. Treat variety selection as both a practical farm decision and a long-term business plan. The choice between Arabica and Robusta is the first fork in the road, but the path continues through cultivar selection, clonal lines, and local adaptation.
Arabica and Robusta present contrasting trade-offs that every grower must weigh. Arabica (Coffea arabica) prefers higher altitudes, cooler temperatures, and steady humidity. It rewards those conditions with slower berry maturation, which concentrates sugars and aromatic compounds. The result is a fragrant cup with bright acidity and layered notes—fruity, floral, or wine-like. That flavor premium often commands higher prices, but comes with higher risk. Arabica is more sensitive to coffee leaf rust, pests, and extreme weather. It demands careful pruning, vigilant disease monitoring, and often greater labor inputs to maintain tree health.
Robusta (Coffea canephora), in contrast, thrives in heat and humidity at lower elevations. It is a hardier plant with greater natural resistance to many pathogens and pests, and it produces higher yields per hectare. Beans contain more caffeine and deliver a heavier, earthier cup with richer crema, making them valuable in blends and instant coffee. Robusta’s resilience reduces the need for expensive interventions, which can make it the pragmatic choice for growers focused on volume, stable returns, and lower input costs.
Beyond that species-level decision, the finer details shape success. Local microclimate is crucial: look beyond regional averages and assess your farm’s slope, aspect, wind exposure, and frost risk. Higher elevations cool nights and slow ripening—ideal for specialty Arabica. Lowland, coastal, or valley sites with high mean temperatures favor Robusta or specially bred Arabica hybrids. Soil type and drainage also influence variety choice. Well-draining, organic-rich loams with a slightly acidic pH favor Arabica’s nutrient needs; Robusta tolerates heavier soils and more variable conditions.
Modern coffee production also offers many intermediate options: hybrids and improved cultivars that blend flavor with resilience. These include disease-resistant Arabica lines and Robusta crosses developed for quality. Clonal selections produced from cuttings preserve desirable traits such as uniform yield, predictable maturation, and specific flavor profiles. Seed-propagated populations, by contrast, produce genetic variability that can be useful where diverse traits help adaptation, but they may lack the uniformity prized by commercial operations. Decide whether you want the consistency of clones or the genetic diversity of seeds; each has consequences for management and long-term performance.
Disease resistance is a vital factor. Coffee leaf rust and other fungal problems can devastate susceptible varieties. If your region has a history of rust, favor resistant cultivars or Robusta, and plan integrated management—proper spacing, shade management, and sanitation—to reduce disease pressure. Resistant varieties are not invulnerable, but they can reduce chemical use, save labor, and improve yield stability.
Yield expectations should be realistic and tied to cultivation goals. Specialty Arabica fields often carry fewer plants per hectare, more selective harvesting, and higher labor costs; they aim for quality and higher per-kilo returns. Robusta fields emphasize density, mechanization where possible, and resilience. Consider how you intend to process and sell your coffee. If your goal is single-origin, specialty coffee with direct trade relationships, Arabica or a high-quality hybrid might be the right path. If you plan to supply commercial roasters or instant producers, Robusta can be a dependable, profitable option.
Shade and agroforestry strongly interact with variety choice. Many Arabica varieties respond well to partial shade, which moderates temperature, reduces moisture stress, and can enhance cup quality by slowing cherry maturation. Planting shade trees like native fruit trees or nitrogen-fixing species creates habitat diversity and can improve soil fertility. Robusta tolerates more open, full-sun systems, though it also benefits from shade in extreme heat. When designing a shade strategy, match tree species to soil and water availability and to the light preferences of your chosen coffee variety.
Propagation method affects early establishment and future performance. Seedlings from well-selected, disease-free parent plants produce vigorous fields but with genetic variability. Nursery-produced clones ensure that every plant carries desired traits, which simplifies management and yields more predictable harvest windows. Whatever method you choose, prioritize healthy nursery practices: screened seed, clean media, shaded beds, and controlled watering. Transplant timing should align with local rainy seasons to minimize transplant shock.
Flavor potential is critical for growers targeting specialty markets. Many cultivar descriptions list sensory notes, but flavor is also shaped by terroir and processing. If you aim for distinct, high-scoring cups, select varieties with proven quality in similar climates and invest in precise post-harvest processing. Varieties with slower maturation and denser beans often respond best to washed and honey processes, whereas some robust cultivars excel under natural drying for bold, full-bodied character.
Economic and labor realities close the loop. Arabica often needs more hands-on care and selective harvesting, which increases labor costs but can deliver premium prices. Robusta reduces labor intensity and chemical inputs but typically brings lower prices per kilo. Evaluate your access to labor, local wage levels, and your marketing channels before committing to a variety. Think long term: initial savings from a low-input variety can be offset by lower market price and fewer premium opportunities.
Finally, test small before you scale. Establish demonstration plots with your top two or three choices. Track growth, disease pressure, yield, and cup quality over two to three harvests. Engage local extension services or cooperative agronomists to help interpret results. Successful farms often blend varieties across microplots to hedge risk, meet diverse market demands, and maintain ecological balance.
Selecting the right coffee variety is a balancing act between environment, market, and management capacity. Choose deliberately. Match species and cultivars to altitude and climate. Favor disease-resistant lines where threats are known. Align your choice with intended processing and sales channels. And always validate choices on a small scale before expanding. Thoughtful variety selection turns soil and climate into consistent, high-quality harvests, whether you aim for specialty clarity or robust resilience.
Preparing the Ground: Choosing the Perfect Soil and Site for Growing Coffee Beans

Preparing the ground for coffee is the single most important practical step you will take. The right site and a carefully prepared soil profile determine how well young coffee plants establish, how deep their roots can explore, and how resilient trees will be to drought, pests, and nutrient stress. Coffee evolved as an understory tree in tropical forests, so replicating that environment—deep, fertile soils, filtered light, stable moisture—gives you a head start. This chapter walks through what to look for and how to shape your planting area so your coffee trees can grow vigorously and produce quality cherries.
Start with soil depth and structure. Coffee roots need space to develop; aim for at least three to four feet of friable soil. Deep soils allow roots to seek water during dry spells and anchor trees against wind. If your site has a hardpan or compacted layer, that barrier will limit root depth and reduce nutrient uptake. Dig test holes across the site to check depth and consistency. Where a hardpan exists, break it up mechanically or by deep ripping before planting. In small plots, manual digging and loosening with a mattock or broad hoe can be effective. For larger areas, machinery may be warranted, but avoid compacting soil further with heavy equipment.
Soil texture influences drainage and root penetration. Coffee prefers loamy or sandy-loam soils that combine good drainage with water-holding capacity. Heavy clay holds water and risks waterlogging, which suffocates roots. Very sandy soils drain well but can be poor in nutrients and dry out quickly. If your soil is too heavy, amend it with well-rotted compost and organic matter to improve structure and aeration. If it is too light, add organic matter to increase water retention and nutrient reserves. The key is balance: aim for a crumbly texture that allows roots to move freely while retaining enough moisture between rains.
Organic matter is not optional. Incorporating compost, decomposed manure, or leaf mold dramatically improves soil fertility and structure. Organic matter feeds beneficial soil life, enhances moisture retention, and slowly releases nutrients. Before planting, mix several inches of compost into the top 30–40 cm of soil in each planting hole and across nursery beds. If compost is scarce, prioritize the planting holes and use mulch on the surface to gradually increase organic content. Over time, maintain organic inputs through regular mulching and periodic additions of compost or green manures.
Soil pH influences which nutrients are available to coffee. Aim for a slightly acidic pH between 6.0 and 6.5. Within this range, essential nutrients such as nitrogen, phosphorus, and potassium are most accessible. If your soil is too acidic, liming can raise pH; if it is too alkaline, applications of elemental sulfur or acidic organic materials can lower pH. Always test soil before making adjustments. Small, corrective amounts applied over time are safer and more sustainable than large, sudden changes.
Site selection extends beyond soil. Coffee prefers partial shade, mirroring its forest origins. Direct, harsh sunlight stresses leaves and increases water demand, especially in hot climates. Partial shade moderates temperature, reduces evapotranspiration, and maintains a more stable microclimate. Where possible, use existing trees as shade providers. Planting beneath taller species such as banana, mango, or nitrogen-fixing trees creates a beneficial canopy. These trees supply shade, organic litter, and sometimes income from companion crops. Choose shade trees that do not overly compete for water and nutrients and that have canopies allowing dappled light to reach coffee foliage.
Aspect and slope matter as well. Gentle slopes, up to around 30 degrees, are ideal because they prevent waterlogging and encourage cold air drainage. Avoid low-lying sites prone to standing water. South-facing slopes in the tropics receive more sun and tend to be warmer; north-facing slopes are cooler. Select the aspect that aligns with your microclimate and the coffee variety you plan to grow. Arabica thrives at higher elevations with cooler nights, while Robusta tolerates warmer conditions at lower elevations. Soil erosion on slopes is a real risk; use terraces, cover crops, and mulches to protect the surface and keep topsoil in place.
Water dynamics at the site determine how often you must irrigate. Coffee needs consistent moisture but not waterlogging. A shaded site retains moisture longer and reduces irrigation needs. If you rely on rainfall, observe your site through a full annual cycle before planting. Note any waterlogging after heavy rains and how quickly the soil dries during drought. Where rainfall is unreliable, plan for supplemental irrigation and design it to deliver steady, moderate moisture rather than periodic flooding. Drip irrigation systems are efficient for conservation and root health.
Beyond the physical characteristics, assess the biological environment. Healthy soil teems with life: earthworms, mycorrhizal fungi, and beneficial bacteria all support coffee growth. Practices that encourage this life—minimal tillage, cover cropping, and consistent organic inputs—pay dividends in resilience and yield. Conversely, soils depleted by continuous monocropping or excessive chemical inputs may need a rebuilding period. Rotate companion crops, plant green manures, and allow fallow periods where possible to restore soil vitality before establishing coffee.
Practical planting preparations tie these elements together. Mark out planting lines that respect your chosen spacing and slope. Excavate planting holes 40–50 cm wide and deep where you will place seedlings. Mix the excavated soil with compost and a modest phosphorus source; work this amendment into the backfill so young roots encounter fertile soil immediately. If you detect compacted layers at depth, loosen them before planting the seedling. Position the root ball so the top of the root zone matches the surrounding soil level; avoid burying the stem too deeply.
Mulch each planting station with an organic layer of straw, wood chips, or leaf litter. Mulch moderates soil temperature, reduces moisture loss, and suppresses weeds. Keep mulch a few centimeters away from the stem to prevent rot. Maintain a weed-free zone during the early years; competition from weeds can severely limit young plants. Use manual weeding and mulches rather than chemical herbicides to protect soil life.
Finally, monitor and adapt. A planting site that looks ideal on paper will still surprise you. Keep records of tree vigor, soil moisture, and pest pressure. Where problems emerge, adjust shade levels, increase organic inputs, or amend drainage. Thoughtful observation in the first two years will pay off with a productive coffee stand for decades.
For a global perspective on recommended soil and site conditions and additional technical details, consult the International Coffee Organization’s guidance on growing coffee: https://www.ico.org/growing-coffee
Seed, Soak, Sprout: The Quiet Craft of Growing Coffee Beans from Seed
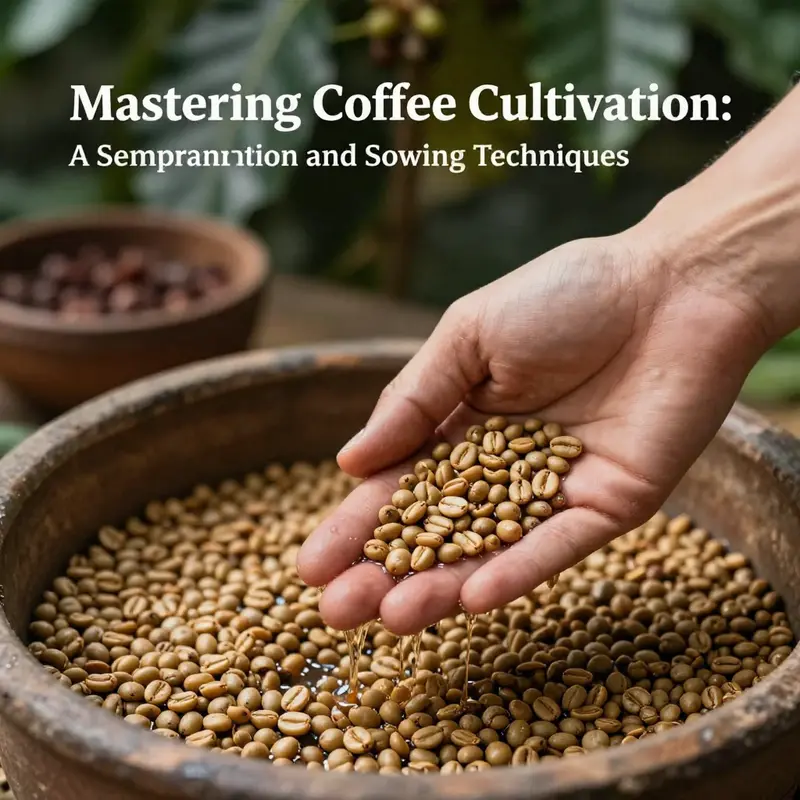
Taking coffee from field to cup begins long before harvest. It starts with seeds chosen with care, because the future tree carries the promise of flavor and resilience. In a home garden or a small nursery, seed preparation lays the foundation for vigorous germination and robust seedlings. The easiest path to success is to begin with mature, high-quality seeds sourced from a reliable place. The choice matters as much as soil and climate. The best candidates are fully ripe, well-developed seeds with strong inner kernels that will tolerate the stresses of early growth. Before sowing, inspect the seeds for uniform size and clean appearance. Discard seeds showing mold, discoloration, or obvious damage. This initial curation reduces the risk of disease later and saves time down the line. The seeds you select determine how quickly sprouts push through soil, how well they establish in a nursery bed, and how sturdy young plants will be when transplanted. The goal is a clean, purposeful start that supports a long and steady growth trajectory.
Once seeds are chosen, the next step is to remove the fruit pulp and mucilage without harming the inner seed coat. The traditional approach is to separate the beans from the cherry by gentle washing or pulping. In practice, you can remove pulp by hand or with a small grinder, then begin controlled fermentation in water for a window of about 12 to 48 hours. During fermentation, enzymes loosen mucilage, enabling easier washing. You can monitor the process by observing a slight foam and the softening of the pulp. After fermentation, rinse thoroughly to remove remaining residue. The seeds should feel clean and free of sticky mucilage. A final rinse reduces the risk of fungal growth during germination. At this stage, the seeds are primed for the essential soak that prepares them for germination. Soaking in warm water for 12 to 24 hours softens the seed coat, improving water infiltration and accelerating emergence. Following soaking, drain and keep seeds in a shaded, moist environment until sowing. It’s vital to test viability with a quick germination check and retire any seeds that fail to sprout.
Viability is the quiet gatekeeper of a successful start. If fewer than about 85 percent of seeds germinate, you may waste time and resources. To protect your investment, perform a simple germination test by placing a subset on a damp cloth or in a shallow tray and keeping them warm. The aim is to confirm a robust germination rate before committing soil and space. Seeds showing no signs of swelling or growth should be set aside. With healthy seeds in hand, move to sowing in a nursery mix. Use a well-draining potting medium rich in organic matter. A blend of peat moss, perlite, and compost works well because it holds moisture without becoming soggy. The sowing depth should be about one inch, and seeds should be spaced at least three inches apart to give room for root development. After sowing, cover lightly and press to ensure good contact. Maintain consistent moisture, but never let the surface stay waterlogged. Coffee seedlings are vulnerable to damping-off when the mix stays too wet. A steady, gentle moisture regime supports even emergence and strong initial growth.
Temperature and light are the next guiding variables. In warm, shaded settings, keep the soil temperature around 70 to 80 degrees Fahrenheit (21 to 27°C). Direct sun should be avoided during the initial weeks, as young roots and leaves can lose moisture quickly. A sheltered, bright site with filtered light supports steady growth while the seed coats dry and the first true leaves appear. If you are starting seeds indoors, place them in a warm location and use a light canopy to protect seedlings from heat stress. Grouping containers helps monitor humidity and prevent drafts. The goal is to mimic a microclimate that coffee plants crave: stable warmth, high humidity, and gentle light. As germination nears, maintain surface moisture and watch for uniform sprouting; uneven germination often signals temperature or moisture gradients that need adjustment.
Germination typically occurs within two to four weeks, though variability exists across varieties. Once seedlings show the first true leaves, they deserve space to breathe. Transplant them into larger containers or into outdoor beds with partial shade, keeping them protected from strong winds. The early weeks are a critical window for root establishment; keep the soil consistently moist but not soggy, and ensure good drainage. Coffee plants prefer slightly acidic soil, so a pH around 6.0 to 6.5 supports nutrient uptake without stressing roots. If you notice yellowing between the veins or slower growth, test pH and adjust with appropriate, organic amendments. During this nursery phase, apply light, balanced nutrition in modest amounts to fuel steady growth without encouraging lush, spindly growth. Overly aggressive feeding can lead to foliage at the expense of roots, so careful, incremental nutrition is essential.
As seedlings strengthen, plan for field transplantation with careful site selection and spacing. Arabica typically thrives at higher elevations with cooler microclimates, so align spacing and shade to future canopies. In the field, spacing becomes a practical equation of sun, air movement, and soil depth. Rows are set wide enough to allow access, while plants between rows are spaced to minimize competition for water and nutrients. The moment a nursery plant meets outdoor conditions marks a new chapter in cultivation, one that continues through pruning, pest management, and eventual harvest. The seed stage, though small, sets the tempo for the years to come, shaping flavor potential and disease resistance. Attention to seeds, meticulous handling of mucilage and coat, and careful management of moisture and light create a sturdy foundation for a thriving, long-lived coffee crop. For deeper, professional guidance on cultivation strategies, consult established agricultural resources like Coffee.org, which provides ongoing, up-to-date recommendations for coffee seed selection, processing, and germination best practices. https://www.coffee.org/
From Nursery Beds to Field Rows: Crafting a Strong Start for High-Quality Coffee Beans
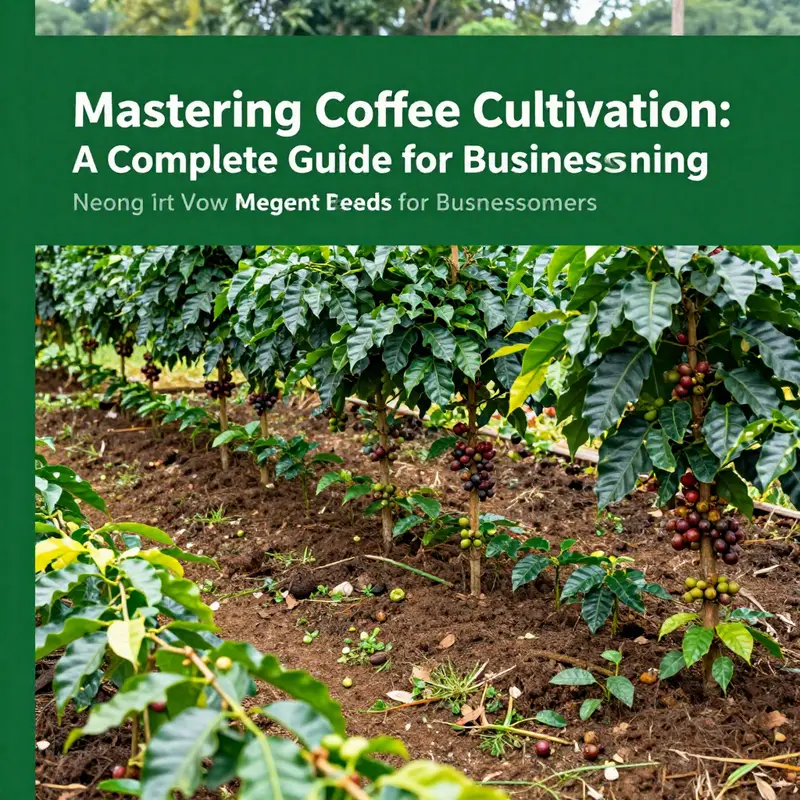
Growing coffee beans begins long before the first leaf unfurls on a young plant. It starts in the nursery, where seed quality, environmental control, and careful handling set the tone for vigor, resilience, and eventual yield. The journey from seed to seedling is a patient apprenticeship in microclimate and soil, a sequence of deliberate steps that translate genetic potential into a robust, productive tree. When you respect the seed’s need for warmth, moisture, and protection, you give the plant its best chance to endure the demands of the field and to express the nuanced flavors that make Arabica renowned. The nursery is not merely a staging area; it is the root of the farm’s long-term management—where the decisions you make about germination, sanitation, and transplant readiness ripple through years of growth and harvest. In practice, the foundation begins with understanding seed viability and dormancy, which decline quickly after harvest. For high-quality Arabica, fresh seeds from healthy mother trees are essential, and viability often drops markedly after about three months. In the nursery, that urgency translates into action: the clock starts soon after harvest, and delay can silently erode potential. The first imperative is seed preparation and germination, a window of opportunity that rewards meticulous timing. Plump, disease-free seeds are selected, with any shriveled or damaged specimens discarded. To coax germination, seeds are soaked in clean water for a day to two, with the water refreshed to prevent rotting. After soaking, they are placed on a moist bed of sand or vermiculite and kept at a steady warmth, typically between twenty-five and thirty degrees Celsius. Consistent humidity matters as well, because dormancy break is a fragile moment. In healthy conditions, a tiny white root tip appears within one to two weeks, signaling that the seed has awakened and is ready to become a seedling. This germination phase is a prelude to a more controlled nursery environment that protects the delicate roots and emerging shoots from the rigors of the open environment. The ideal nursery is a shelter—either a greenhouse or a shaded structure—that moderates temperature, provides warmth, and offers steady air circulation. Partial shade, reducing light by roughly thirty to fifty percent, helps seedlings acclimate to the filtered sunlight they will receive once transplanted outdoors. The goal is not darkness, but a gentler light regime that mirrors the canopy’s embrace in a young plantation. For the soil, a well-considered mix supports drainage while delivering nutrients. A practical nursery bed uses a blend, often described as three parts garden soil, two parts well-rotted compost or leaf mold, and one part coarse sand. This 3:2:1 mix provides structure, moisture retention, and mineral content that seedlings crave during their first months. Before use, the soil should be sterilized to reduce the risk of damping-off and other pathogenic threats that can devastate young roots. Such sanitation is not merely precautionary; it is the bedrock of a healthy canopy-laying crop. Once seeds reach the stage where the radicle is visible, they are transferred to individual pots or prepared nursery beds. Planting depth is shallow—about one to two centimeters—so roots can quickly establish their first anchor without being overwhelmed by soil. Gentle backfilling secures the seedling, followed by thorough watering to settle the soil around the root ball. The nursery phase is a careful balance of moisture and air; it requires consistent moisture without saturating the root zone, a rule that becomes more crucial as seedlings approach the six- to twelve-month mark. During this time, pests such as aphids or spider mites may intrude, so monitoring and early intervention are essential. The objective is not perfection in a single season but steady, incremental growth that builds a resilient root system and a sturdy stem. When the seedlings have reached a height of roughly thirty to sixty centimeters and have formed a strong root system, they are ready to graduate to the field. Transplanting is a landmark moment in a coffee grower’s calendar, and it should be timed with the ecosystem’s rhythms. Sites should be warm, with daytime temperatures around twenty to twenty-five degrees Celsius and nights comfortably above ten degrees. A reliable and evenly distributed rainfall regime—ideally between fifteen hundred and two thousand millimeters per year—supports steady establishment. The site’s soil should be fertile, well-drained, and slightly acidic, with a pH in the range of five to six and a half. This fosters nutrient availability while accommodating the plant’s preference for oxygen-rich root zones. For Arabica, elevation matters: the sweet spot often sits between eight hundred and two thousand meters above sea level, where cooler nights slow maturation and cultivate the complexity of flavors. Spacing in the field is a precise art. Rows are typically set about three meters apart, a rhythm that allows light to reach the canopy while leaving ample room for root exploration. Within each row, plants should be placed two to three meters apart, depending on varietal goals and management intensity. When planting, holes are prepared to accommodate the root ball, roughly fifty centimeters deep and wide. The goal is gentle accommodation rather than crowding, with the backfilled soil packed firmly enough to prevent sinking yet loose enough to allow initial root expansion. Watering deeply after transplanting is non-negotiable; the root ball must receive moisture that encourages a strong grip in the new soil. Mulching around the base helps conserve soil moisture, suppress weeds, and gradually enrich the topsoil as the organic layer decomposes. The early post-transplant period is not the moment for heavy feeding; it is a time to establish a healthy root system. Fertilization should be conservative in the first year, with a focus on balanced nutrition that supports growth without forcing excessive top growth. Pruning at this stage should be light, aimed at shaping the young tree so it can capture sunlight efficiently and promote upright, strong growth. The aim is a canopy that is well-ventilated and open enough to reduce disease pressure while enabling photosynthesis to translate into robust vigor. The nursery-to-field transition is more than a physical move; it is a transfer of confidence. The seed’s life progress—its germination, seedling hardening, and eventual root anchoring—has set the stage for subsequent years of cultivation. When the plant finally sits in its field site, it carries with it the quiet promise expressed in every careful step during nursery management: a plant that has learned to balance moisture, nutrients, and light, a plant that has been taught to tolerate the gusts of wind and the heat of midday sun, and a plant that can, with proper care, become a source of coffee with the depth and sweetness that define high-quality cups. In practice, the path from nursery to field is a choreography of soil science, climate awareness, and patient stewardship. It requires attention to the seed’s first needs, a controlled environment that guards against disease, and a transplanting protocol that respects the plant’s emerging root system. Each stage feeds into the next: germination success informs seedling vigor; nursery soil and shade prepare the roots and shoots; timely transplanting and prudent post-plant care set the stage for productive years. This integrated approach, anchored in the details of seed viability, germination timing, and careful field establishment, becomes the backbone of a robust coffee operation. By recognizing that the earliest days shape the tree’s entire life, growers can ensure that the beans grown in the subsequent years carry the character, resilience, and consistency that differentiate a good harvest from a great one. For further reading and practical guidelines tailored to home and small-scale cultivation, consult reliable resources that translate these principles into region-specific practices. External resource: https://www.extension.org/articles/how-to-grow-coffee-at-home/
Nurture to Harvest: Ongoing Care, Pest Management, and Timely Picking for Top-Quality Coffee Beans
Nurture to Harvest: Ongoing Care, Pest Management, and Timely Picking for Top-Quality Coffee Beans
Growing coffee beyond the nursery requires steady attention, a practiced eye, and a willingness to act quickly when problems arise. Once seedlings are in the field, the task shifts from establishment to maintenance: keeping trees vigorous, protecting them from pests and diseases, and harvesting cherries at the precise moment that captures the plant’s best flavors. This chapter guides you through the continuous care coffee plants need, the practical steps to prevent and manage major threats, and how to time and handle harvest and processing so your yield becomes excellent, not merely adequate.
Coffee plants respond directly to consistent, right-sized care. They need balanced moisture—not waterlogged soil, and not prolonged drought. In practice, that means checking soil moisture weekly during wet seasons and daily during dry spells, especially for younger trees in their first two years. Use hand-feel or a simple soil probe to ensure the top 10–20 cm of soil is slightly moist but not saturated. Irrigate deeply and infrequently rather than shallow and often; this encourages deeper root growth and greater drought resilience. Mulch heavily around each tree to conserve moisture, suppress weeds, and feed soil microbes as the mulch decomposes. Organic mulches—straw, leaf litter, or wood chips—work well and reduce the need for frequent watering.
Nutrition is equally vital. Coffee needs a balanced supply of nitrogen, phosphorus, and potassium, tailored to growth stage. Young trees benefit from slightly higher nitrogen to encourage leaf and stem growth. As trees approach the reproductive stage, shift to a formula with more phosphorus and potassium to support flowering and fruit set. The precise rates depend on soil tests. Conduct a soil analysis every two to three years and adjust your fertilizer regime accordingly. Apply fertilizer in small, frequent doses during the growing season rather than one heavy application; this reduces nutrient runoff and promotes steady uptake. Incorporate organic matter each year—compost, green manure, or well-rotted farmyard manure—to maintain a lively, fertile root zone and to buffer pH toward the preferred range of 5.5–6.5.
Good canopy management helps light and air penetrate the trees, reducing disease pressure and improving cherry maturation. Prune annually after harvest to remove dead or weak branches, thin crowded internodes, and open the canopy. Aim for a structure that allows filtered sunlight to reach inner branches while keeping sufficient shade to protect leaves from intense midday sun. In many systems, taller shade trees such as banana or native species are retained to moderate temperature and humidity. Maintain a balance: too much shade lowers yields and delays ripening, while too little increases sunscald and stress.
Pest and disease management must be routine and proactive. Regular scouting is the keystone of early detection. Walk the rows on a schedule—weekly during vulnerable periods such as flowering and early fruit set—inspecting leaves, stems, and cherries. Look for telltale signs: yellow-orange powder on the underside of leaves for rust, tiny holes and frass in cherries for the coffee berry borer, or webbing and stippling for mites. Keep simple records of sightings: date, location, percentage of affected plants, and weather conditions. This log becomes invaluable for spotting patterns and timing interventions.
Integrated Pest Management (IPM) is the most effective long-term approach. IPM combines cultural, biological, and, when necessary, chemical controls to suppress pests while preserving beneficial organisms. Cultural tactics are the first line: maintain good sanitation by removing fallen, infested cherries and diseased leaves; avoid planting susceptible varieties in known hotspots; and practice timely pruning and shade management to reduce humidity pockets where pathogens thrive. Crop hygiene limits inoculum build-up and reduces the frequency of more aggressive measures.
Biological controls harness natural enemies. Encourage predatory insects, parasitoids, and beneficial fungi by maintaining habitat diversity around the plantation. For the coffee berry borer, tiny parasitic wasps and predators such as beetles can reduce populations. Introduce or conserve these allies by avoiding broad-spectrum insecticides that kill beneficial species. When chemical measures are required, choose targeted options with lower environmental impact and apply them in the evening when pollinators are less active.
Diseases demand careful attention. Coffee leaf rust remains one of the most damaging fungal diseases. Prevention centers on cultural practices: adequate spacing, open canopies, and removal of infected material. Resistant varieties or rootstocks can reduce risk where rust pressure is constant. If infection appears, treat promptly with appropriate fungicides following local agricultural guidelines, and combine chemical treatment with improved airflow and reduced shade. For other fungal threats, such as gray spots or wilt pathogens, sanitation and soil management are core strategies; rotate treatments and avoid overreliance on a single fungicide to slow resistance development.
Pest control for smallholders and home growers can prioritize low-toxicity options. Neem oil, insecticidal soaps, and botanical extracts can suppress many insects without harming non-target organisms. Traps and baiting systems can reduce beetle pressure. For the coffee berry borer, consider trapping adults during peak flight times and using targeted baiting to reduce breeding. If chemical controls are necessary, follow label directions exactly, wear appropriate protection, and respect re-entry intervals to protect workers and wildlife.
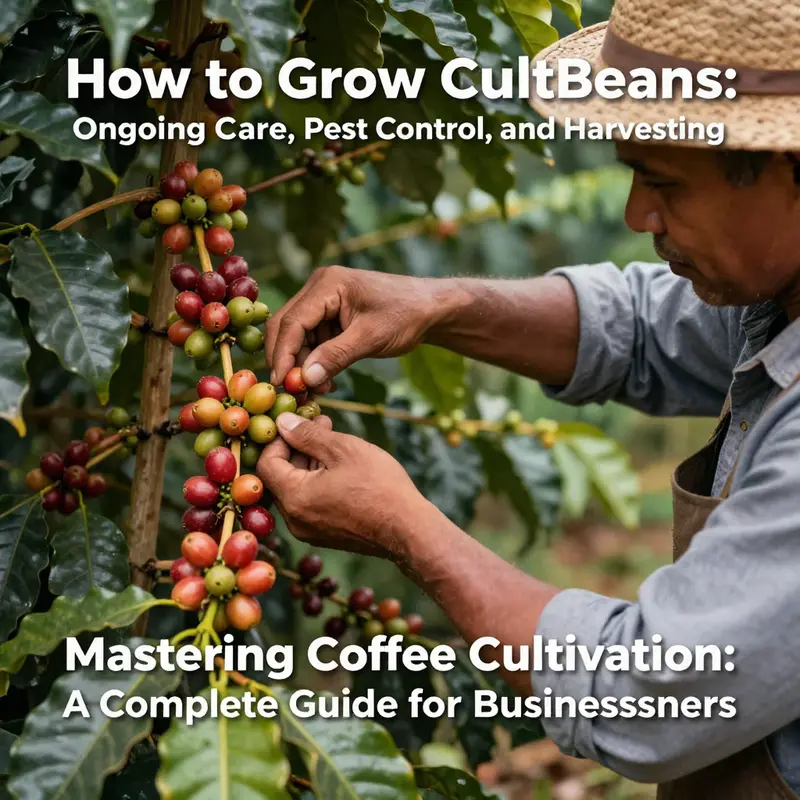
When blossoms form and cherries begin to set, the timing of harvest becomes the decisive quality control. Ripe cherries contain the sugars and acids that yield superior cup characteristics. Plan harvests for peak ripeness: cherries are ready when they reach the variety’s characteristic color—deep red for most Arabica, sometimes yellow or orange for specific cultivars. Educate pickers to harvest selectively, removing only fully ripe cherries from the tree and leaving unripe ones to mature. This selective hand-picking may require multiple passes through a block during a season, but it dramatically improves cup quality.
For larger operations or where labor is scarce, mechanical harvesting is an option, especially for Robusta varieties that ripen more uniformly. Mechanical methods save time but often mix ripe and unripe cherries, lowering overall quality. If mechanical harvesters are used, follow with more rigorous sorting during processing to eliminate underripe or damaged fruit.
Processing begins immediately after harvest. Delay invites unwanted fermentation and quality loss. Choose a processing method suited to your climate and resources. The washed method produces bright, clean flavors by removing pulp and fermenting briefly before washing and drying. The natural, or dry, method can yield sweeter, fruit-forward profiles when cherries are dried carefully and consistently. The honey process, where some mucilage remains during drying, offers a middle ground. Regardless of method, monitor fermentation and drying carefully. Aim to dry beans to a stable moisture content—around 11–12%—to prevent mold or off-flavors during storage.
Drying should be uniform and protected from rain and humidity. Use raised drying beds or patios with frequent turning to ensure even drying. For small-scale growers, solar dryers or covered raised beds allow control over drying conditions. Once target moisture is reached, store beans in cool, dark, moisture-tight containers. Maintain low humidity and avoid temperature swings to protect green beans until roasting.
Throughout this period, patience and observation are your best tools. Healthy trees, monitored closely, rewarded with timely interventions, yield cherries that justify the labor. The practices described here blend simple, low-cost tactics with disciplined monitoring to control pests and diseases, sustain soil fertility, and harvest at the moment that captures the best flavors. For additional technical guidance and region-specific recommendations, detailed production manuals such as the U.S. Department of Agriculture’s coffee production overview provide useful reference material: https://www.nass.usda.gov/ResearchandStatistics/CropsandLivestockCensus/2017CensusofAgriculture/2017CensusofAgricultureFactsheets/Coffee.pdf
Final thoughts
Growing coffee beans holds immense potential for business owners aiming to expand their product portfolio and enhance customer satisfaction. By following the outlined best practices—from selecting the appropriate variety to ensuring diligent care and effective harvesting methods—entrepreneurs can not only produce high-quality coffee but also build a sustainable business model. Embarking on this journey will require both patience and dedication, but the rewards of serving fresh, home-grown coffee can significantly elevate your business offerings.