
As a business owner, providing high-quality coffee is essential for creating a memorable customer experience. However, not every establishment has access to specialized coffee grinders. Luckily, grinding coffee beans without a dedicated grinder is feasible using various household items. This guide will delve into effective methods like using rolling pins, mortars and pestles, knives, blenders, and the importance of grinding just before brewing. Each chapter will equip you with practical techniques that can enhance your coffee offerings, ensuring that even without a grinder, you can still produce remarkable coffee.
How to Grind Coffee Beans Without a Grinder Using a Rolling Pin
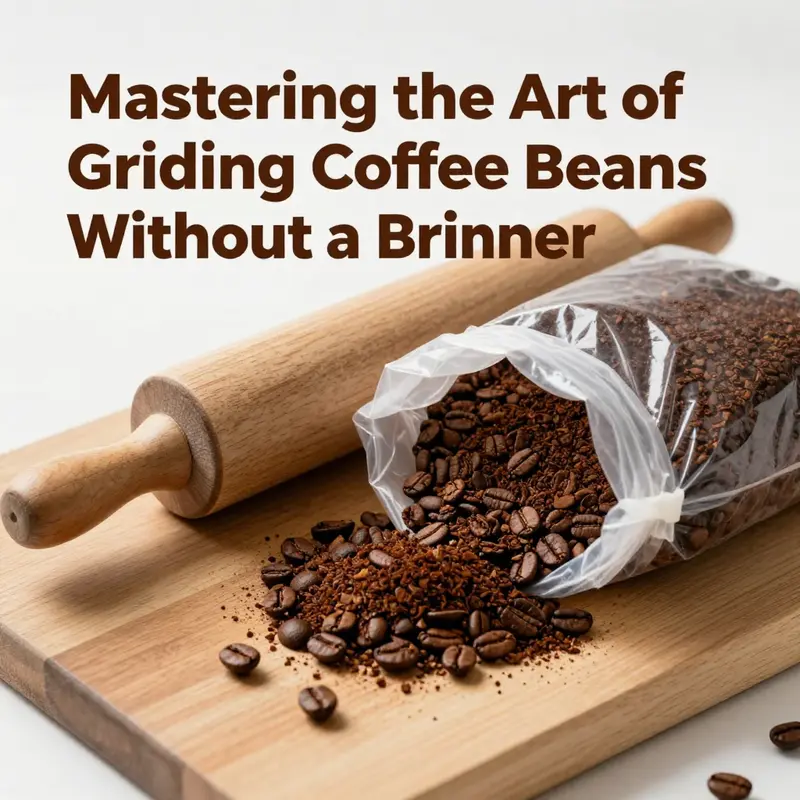
When the morning rush arrives or a grinder is nowhere to be found, a well-worn rolling pin can become an instrumental ally in the kitchen. This chapter centers on a practical, approachable technique that leaves no room for excuses about unavailable equipment. The rolling pin method isn’t just a quick fix; with patience and a few deliberate steps, it can yield a reliable, repeatable grind that matches your brewing method. The aim is not perfection on the first try, but a texture that reads as a coherent bridge between the beans you bought and the cup you crave. In that spirit, a practical mindset matters as much as the apparatus you choose. A bag of beans, a sturdy surface, and a rolling pin can transform into a coordinated grinder without ever plugging in a motor. The result will be best when you approach it with intention, treating the process as a short ritual rather than a hasty chore. The beauty of this method lies in its accessibility and its respect for freshness. Coffee begins to lose aroma and flavor as soon as it’s ground, so the imperative to keep grinding only what you need is especially important here. The rolling pin method shines precisely because it encourages you to grind small batches, just enough for the brew you’re about to make, minimizing oxidation and preserving delicate oils and fruity notes that define each bean’s character.
To begin, set up with a 30-gram portion of beans for two cups as a practical starting point. Place the beans into a thick, sealable plastic bag—heavy-duty is worth the extra cost because thin bags can tear and unleash a messy situation. For added security, consider using two layers or slipping the bag into a paper towel or thin cloth before sealing. The goal is to create a stable pocket that won’t burst under pressure, while still allowing your rolling pin to transfer force efficiently into the beans. Once sealed, remove as much air as possible so the bag becomes a rigid, crushable envelope, and lay it flat on a sturdy surface—your cutting board or kitchen counter works well. This is not a race; the weight and stability of the surface matter as much as the force you apply.
Crush first, not grind. Position the rolling pin above the bag and press straight down with firm, even pressure. The aim here is to crack the beans into smaller fragments rather than to pulverize them into a powder. By alternately applying steady force, you begin to fracture the beans into a mix of shards and small pieces. This initial step matters because a clean break reduces the amount of time you’ll need to spend grinding later, helping to minimize heat buildup and uneven particle sizes that can compromise extraction. After you’ve achieved a good crack—where the beans resemble broken pieces rather than whole seeds—shift to using the side of the rolling pin. Roll it back and forth across the bag in a smooth, even motion. The rolling action disperses pressure more evenly than a straight downward press and encourages more uniform fragmentation. It’s this transition from vertical crushing to horizontal rolling that often marks the difference between a rough, inconsistent grind and a texture that reads as a coherent medium.
Keep a mindful eye on texture as you work. The target texture depends on your brewing method: for pour-over or drip coffee, you’re aiming for something akin to coarse sand, which allows water to percolate evenly without over-extracting from finer particles. If you’re planning espresso, you’ll want a much finer result, closer to a powder. It’s here that patience and observation pay off. Pause every now and then to gauge the grind. If the contents cling together and form a dusty cloud when disturbed, you’re likely approaching a finer grind; if the pieces remain distinct and loose, you may still be a bit coarse. The beauty of the rolling pin is that you can adjust on the fly by adding more rolling time or returning to the earlier crushing stage for targeted refinement. If a finer grind is needed, continue rolling with the same controlled, even pressure until the grounds begin to resemble powder, but be mindful of heat. Friction generates heat, and excessive heat can dull aromatics and alter flavor notes, especially for delicate beans. Short, deliberate sessions help keep flavor intact.
An optional step many baristas appreciate is a light sieve or flour sifter. After you reach the desired rough texture, pass the grounds through a fine-mesh sieve and separate out any large, unmoved chunks. Return those chunks to the bag and give them a few more gentle rolls. This sieve step is not essential, but for those seeking a more consistent grind, it’s a worthy extra mile. It’s a small investment of time that pays off in more uniform extraction, improving clarity and balance in the cup. The sieve technique aligns with the goal of reproducibility: the more uniform the particle distribution, the more predictable the brewing chemistry becomes, whether you’re pulling a shot of espresso or pouring a careful filter brew.
Along the way, a handful of practical tips helps the rolling-pin method stay on track. Use a thick, heavy rolling pin; a sturdy wooden one tends to require less effort and yields more consistent pressure than lighter alternatives. The bag itself must be secure. If you notice any tearing or leaks, pause, rewrap, and restart—splinters and stray coffee bits will complicate cleanup and can lead to uneven results. Maintain steady, even pressure rather than swinging the pin with force. Inconsistent force will produce a mix of particle sizes and may introduce fines that over-extract or coarser chunks that under-extract. Working in batches, rather than trying to grind everything at once, makes the operation manageable and improves consistency. Finally, keep in mind that this method is especially suited to pour-over and American-style coffees where a mid-range grind shines. For French press, you might prefer a coarser result; for espresso, you’ll push toward a fine powder—though achieving true espresso grind with a rolling pin is inherently challenging, the technique can still produce viable results in a pinch if you’re patient and adjust your expectations.
From a flavor perspective, the rolling-pin approach respects the same fundamental truth expressed in more traditional methods: grind just before brewing. Freshly ground coffee optimizes aroma and taste because the surface area exposed to air is minimized in the moment of extraction. When you grind right before brewing, you preserve more of the delicate oils that contribute to brightness, fruitiness, and nuanced spice notes. The rolling pin method, by design, keeps you close to that ideal by enabling on-demand grinding in small, controllable increments. It becomes less about achieving a perfect particle map and more about achieving a reliable, brew-ready consistency with the tools at hand. In practice, you’ll discover that the texture you can coax from this method is more forgiving than you might expect twenty years ago. A well-managed rolling action can produce a result that, for many home brewers, sits comfortably within the range needed for a respectful cup.
There is also a user experience dimension to this approach. You don’t need a closet full of coffee gadgets to get a good cup. The rolling pin method invites experimentation and improvisation, which can be part of the joy of making coffee at home. As you gain confidence, you may find your technique becoming more efficient. The sensory feedback—how the bag feels, the sound of the pin meeting resistance, the telltale dust rising from the bag—becomes part of the ritual and your personal brewing language. And because you’re in control of the grind size at every turn, you can tailor your process to your mood and your equipment. If you’re learning pour-over, you can start with a medium grind and then adjust toward a slightly finer or coarser texture based on how the water flows through the coffee bed. If a French press is your orbit, you can tilt toward a coarser, grittier texture that resists too-fast extraction, while still benefiting from the fresh aroma you coax from the beans.
In the end, this method is more than a workaround; it is a reminder of the core relationship between grind, water, and heat. The rolling pin quietly bridges the gap between “whole bean” and “brewing reality,” letting you respect the integrity of the beans while crafting your cup with intention. Keep the beans stored properly—airtight, away from light and moisture—and grind only what you will brew. This simple discipline compounds into a more satisfying cup and a more mindful kitchen routine. If you ever doubt the value of a durable, improvised tool, remember that the rolling pin, an everyday kitchen implement, can transform from potential chaos into a reliable coffee ally with a few patient, deliberate movements. In practice, the method rewards calm, consistent pressure and a willingness to pause, evaluate, and adjust. It is not about speed; it is about control and respect for the beans, the brew method you’ve chosen, and the moment you’ve carved out for coffee in your day.
null
null
Cracking Fresh Flavor: Mastering Knife-and-Cutting-Board Grinding Without a Grinder
When a dedicated grinder isn’t available, a well-timed knife and cutting board can still unlock the aroma and brightness of freshly roasted coffee. This approach is not about perfection or speed; it’s about deliberate, controlled action that turns whole beans into a workable grind for specific brews. The technique sits at the intersection of practicality and patience. It shines most when you’re aiming for a coarse to medium grind, such as what you’d use for French press or certain cold-brew methods. Yet with the right hand position and an unhurried rhythm, it can also deliver something usable for pour-over, provided you accept a bit more variability in particle size. The method is a reminder that coffee lovers don’t always need the latest gadget to extract flavor; they need steadiness, discipline, and a clear goal for extraction.
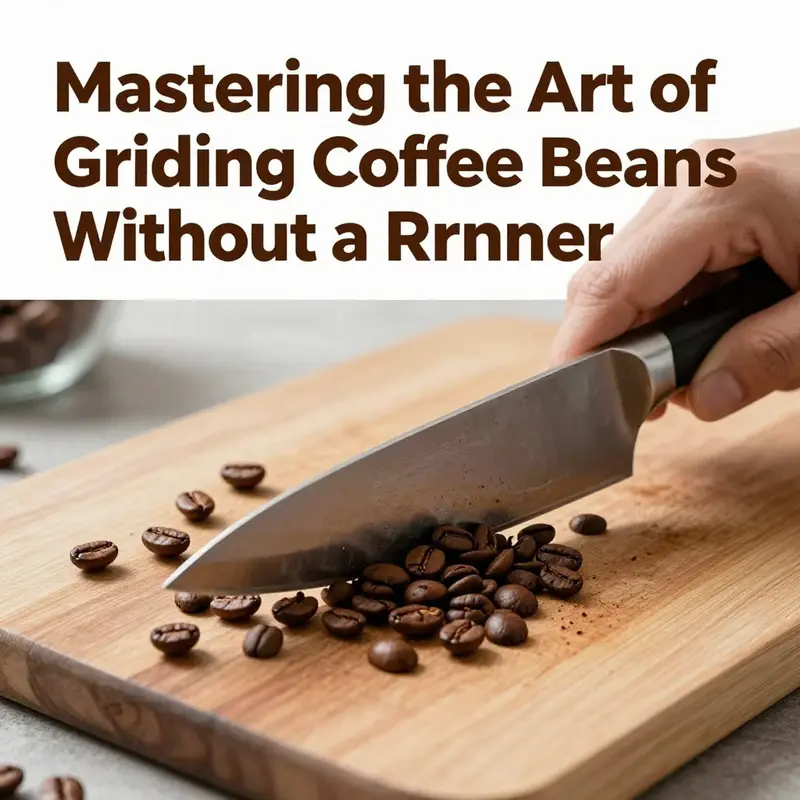
To begin, assemble a small, focused toolkit. The knife you choose matters as much as the board you rest it on. A heavy, wide, sharp chef’s knife is ideal because its flat blade distributes pressure more evenly across the beans and stays less prone to slippage than a thinner blade. A sturdy wooden or bamboo cutting board provides the surface traction needed to guide the blade without dulling it or letting the knife skate away from the beans. Glass, marble, or slick plastic surfaces can compromise control and edge safety, so they’re best avoided for this task. Work in small batches to preserve consistency; 15 to 30 grams per session keeps the process manageable and lets you shape texture gradually until the grind reaches the intended coarseness.
Preparing the beans is almost ceremonial in this method. Place the beans onto the board, and measure out just enough for one or two cups. Avoid overloading at once, because a crowded board invites uneven pressure. The goal is to fragment the beans into manageable pieces first, then gradually reduce those pieces into a coarser powder that can be transferred directly into a brewing vessel or a filter. You’ll notice a difference between the stages of grinding, and that difference is where patience pays off. The blade’s flat side should be used to press down on the beans rather than slicing through them as you would vegetables. The trick is to apply firm, deliberate downward force with your body weight, then gently rock the blade back and forth to crack the beans. This action creates chunks that are easier to manage and that break down more predictably as you continue grinding.
As you work, keep your grip steady and your stance comfortable. Do not rely on the tip of the blade; it’s easy to slip and it can launch the beans in unintended directions. Instead, position the blade so the edge sits flat atop the beans, and press with a consistent pressure. After the initial cracking phase, flip the knife so the flat side remains in contact with the surface but now toward the edge of the blade facing down. In a controlled forward push and a smooth pull-back, drag the crushed fragments toward you, letting gravity assist with the breakup. Repeat this forward-and-back motion, gradually reducing the size of the pieces. The texture you’re aiming for is a coarse, sand-like consistency that works well for French press, where even larger chunks can still yield a robust extraction, provided the water meets the grounds for a full immersion. If you’re fortunate enough to be chasing a finer grind for certain hand-drip methods or even an emergency espresso attempt, you’ll have to execute many more passes and accept more variability. It won’t be as uniform as a powered grinder, but it can still produce a workable result when time and technique align.
Once you approach the desired texture, consider how you’ll handle the next step: transfer and storage. Use a small scoop or the back of a clean spoon to gather the grounds, and move them directly into your brewing vessel or into a container ready for the brew. Freshness matters as much here as in any other method, so grind only what you need. The act of grinding releases volatile aromas that dissipate quickly once exposed to air, and any delay between grind and brew dulls those lively notes. If you have a sieve or a very fine-mesh strainer, you can perform a quick post-grind refinement. A gentle shake will separate the larger fragments from smaller, more uniform particles. If you encounter a few stubborn larger pieces, re-grind them by repeating the process with a smaller batch until the texture feels cohesive. This extra step, though time-consuming, can significantly improve extraction consistency, especially if you’re aiming for a cleaner pour-over result.
In this method, the practice of care matters as much as the mechanics. Work slowly and deliberately; rushing invites unevenness that can translate into inconsistent extraction and a less pleasant cup. Maintain a steady hand, and if you find your board or knife slipping, place a damp towel beneath the board. The towel helps stabilize the surface and reduces the risk of accidents. It’s comforting to know that, unlike electric grinders, this approach doesn’t generate heat that would prematurely degrade delicate flavors. The physical effort does generate some friction, but controlled technique keeps heat to a minimum, preserving the bean’s natural oils and aromatics. If you’re cooking with a sense of precision and patience, you’ll find that even without the modern gadgetry, you can coax a surprisingly bright, nuanced cup from a simple kitchen setup.
Though the knife-and-board method is versatile, it’s not a one-size-fits-all solution. For coarse-ground needs such as French press, it’s an excellent emergency fallback with predictable outcomes when done properly. For cold brew, the grind can be very coarse, which means longer steep times but typically a smoother, sweeter cup. Pour-over or hand-drip brews can be achieved with extra caution and finer management of the grind size, though you should anticipate more variability in particle size compared with a dedicated grinder. When espresso is the target, this method becomes more problematic. Espresso relies on a fine, uniform grind for optimal extraction. The knife-and-board approach, while capable of producing powder-like textures in theory, tends to yield uneven particles and inconsistent extraction, which can manifest as under-extraction or channeling. The practical message is clear: know your method, and tailor your grinding approach to it, accepting trade-offs where they arise.
To deepen the rationale behind why this method can work, consider the emphasis in credible guides that the core principle is consistent pressure and controlled motion. It’s not about speed but about applying a stable force and guiding the blade with care. This is a reminder that coffee flavor is shaped as much by technique as by equipment. The careful pursuit of even particle size through a measured workflow helps preserve aroma and avoid scorching or overheating—factors that can erode flavor even in a pinch. In addition to the physical technique, a quick post-grind evaluation can make a meaningful difference. If your batch yields a mixture of chunks and powder, a brief sift and a second pass over the larger pieces will yield a more uniform texture. The effort pays off in shorter, more even extraction during brewing, with less risk of weak or bitter notes that sometimes arise when surface area is unevenly exposed to water.
In practice, the knife-and-board method fits neatly into an improvised, on-demand coffee routine. Its best use cases remain practical: a French press benefits from a coarse grind that resembles cornmeal in texture, while cold brew thrives on a very coarse grind that slows extraction yet retains clarity. Pour-over can be achieved with extra care, but it requires patience, repeated checks, and perhaps a lighter touch on the grind size. The method’s Achilles’ heel is the absence of perfect uniformity. If you crave the tightest particle distribution for espresso, you’ll still want to seek a proper grinder. But for many morning needs, especially when you’re out of options or traveling lightly, this approach keeps the ritual alive and the flavor intact.
A final thought ties together purpose and practice. The essence of grinding without a grinder lies not in replicating modern gear but in preserving the spontaneity of flavor whenever time and equipment collide. It invites you to slow down, observe the beans, and adjust your approach with intention. The sensory payoff—fresh aroma, a bright, lively cup, and the satisfaction of creating coffee with ordinary tools—embodies a practical philosophy: quality can emerge from simplicity when deliberate hands guide the process. For those who embrace this mindset, the knife-and-board method becomes more than a backup; it’s a reminder that coffee’s charm often resides in the craft of doing, not just the gear you own.
If you wish to explore more visual guidance and safety considerations drawn from trusted guides, you can consult a detailed reference on grinding without a grinder. For added context and practical shots, see resources that explore the step-by-step workflow in similar home-brewing scenarios. External resource: https://www.thespruceeats.com/how-to-grind-coffee-beans-without-a-grinder-4687976
null
null
The Moment of Freshness: Why Grinding Coffee Beans Without a Grinder Right Before Brewing Elevates Every Cup

The first whiff of a freshly ground cup of coffee is not just a sensory pleasure; it is a signal of timing, intention, and respect for the bean. When you grind coffee beans immediately before brewing, you arrest the clock at the moment that matters most: the moment when aromas are most vibrant and oils are most intact. Even without a purpose-built grinder, you can coax a remarkable result from your beans by embracing the fundamentals of freshness and the practical realities of your kitchen. The idea is simple, yet powerful: grind only what you will brew, and do it as close to the moment of contact with hot water as possible. In other words, the best cup begins with the shortest possible window between grinding and extraction.
That window matters because coffee is a living, breathing product. Once the beans are cracked and ground, their surface area expands dramatically. The exposed surfaces invite oxygen to begin a rapid dance with volatile compounds that carried the beans’ aroma and flavor through storage and transport. The more surface is exposed, the faster those compounds evaporate or oxidize. The result is a brew that can taste dull, flat, or discordant when the ground coffee sits too long before it meets hot water. Freshly ground coffee, in contrast, releases a complex bouquet that can surprise a tired palate with brightness, depth, and nuance that pre-ground coffee rarely matches. This isn’t just nostalgia for the scent of a kitchen; it’s a practical truth about how aroma and flavor migrate from bean to cup.
But freshness isn’t only about aroma. It also hinges on how the grind is managed and how air, moisture, and odors in the environment interact with the coffee. Ground coffee is more susceptible to absorbing moisture from the air and picking up stray scents from nearby foods or spices. In a well-sealed bag or can, the beans breathe a little; once ground, those breathed particles have more opportunity to mingle with the world outside. Ground coffee can take on the character of the surroundings more readily than whole beans. Keeping the ground coffee’s exposure to air minimal—by grinding just before brewing and keeping the rest of your coffee in a dark, dry, airtight container—preserves the oils that lend coffee its body and resonance. The goal is peak freshness at the moment of extraction, not hours or days earlier.
Consistency in grind size is another pillar of a satisfying cup. The goal for most drippers is a grind that allows water to flow evenly through the bed, ensuring uniform extraction. An uneven grind—where some particles are coarse and others are fine—leads to over-extraction in some parts and under-extraction in others. That imbalance translates to a cup with inconsistent brightness, an off-body sweetness, or bitterness that crops up in places it shouldn’t. When you grind right before brewing, you minimize the time during which grinds can clump or segregate due to moisture or settling. You gain a more uniform particle distribution, making the brewing process a little more predictable and the final cup a bit more harmonious.
Of course, the practical reality is that a dedicated grinder isn’t always present. The materials you use to grind must be chosen with care, and the technique must be adapted to the brewing method you favor. The science remains consistent across methods: grind size and shape influence extraction, which in turn shapes flavor. For pour-over or drip coffee, aim for a medium grind—roughly the texture of coarse sand. This level of coarseness supports a steady, controlled extraction as water dutifully passes through the bed. For French press, you’ll want something coarser still—more like coarse cornmeal—so the metal filter catches the sludge while the grounds sufficiently contact the liquid. Espresso, with its intense pressure and fast contact time, demands a very fine grind—almost powder-like—so that the water can extract the rich oils quickly. Cold brew leans toward a medium-fine grind, allowing a long steep to extract without turning the mixture gritty or muddy.
The methods you can deploy in a kitchen without a grinder are surprisingly robust, each with its own character and set of steps. The rolling pin inside a sealed plastic bag is a dependable entry point for beginners. Place about 30 grams of beans into a thick plastic bag, double-bag for durability, and seal tightly after pushing out as much air as possible. Lay the bag flat on a stable surface and press with a rolling pin, then roll it back and forth in a broad, even motion. Periodically check the texture against your target: for pour-over, aim for something resembling medium-coarse sand; for espresso, you may need a finer powder. A heavy rolling pin helps, though a wine bottle or a smooth, flat-bottomed object can work in a pinch. The beauty of this method is its accessibility and the way it teaches you to gauge grind progression with your own hands. You learn to read the weight of force, the resistance of the bag, and the texture that emerges, all without new gadgets.
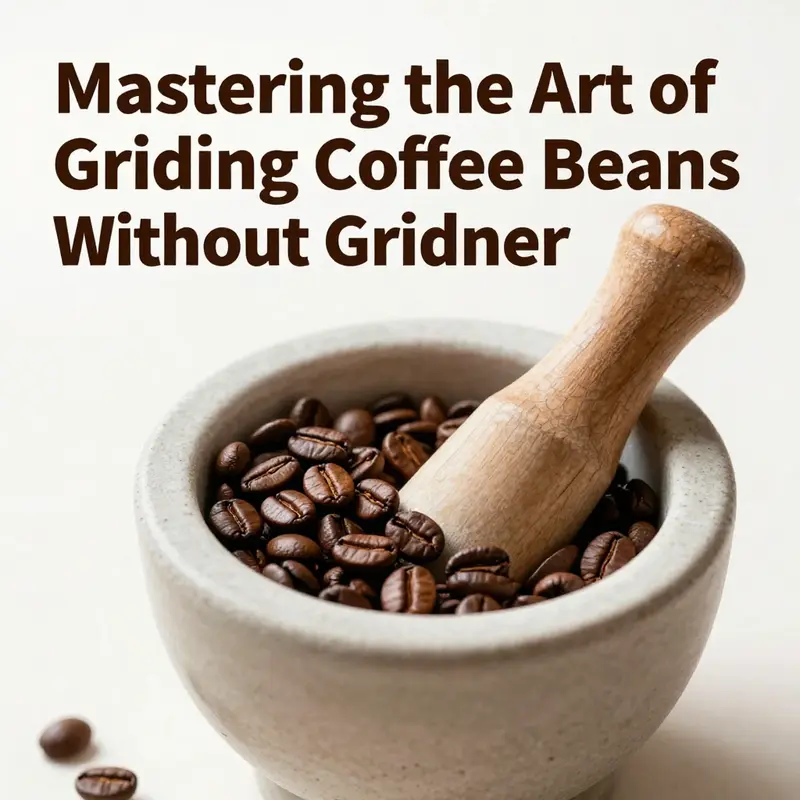
If you want a more uniform particle profile, a mortar and pestle can be a surprisingly effective route, especially when you’re aiming for a coarser grind. A ceramic or stone mortar lets you crack beans with the pestle and then grind with deliberate circular motions. The process is tactile and rhythmic, almost meditative, requiring patience and steady pressure. For French press or Turkish coffee, this method shines because it explicitly aims for a coarse, gritty texture. It preserves more of the bean’s aroma than metal tools and offers a way to coax uniform chunks without turning the beans into a powder that’s difficult to manage with a metal sieve later on.
Then there’s the knife-and-board emergency option. This is where caution and intention matter most. When you’re pressed for time or when other tools aren’t available, a sharp chef’s knife can chop the beans into small pieces on a clean cutting board. You’ll need to work in small batches, making repeated passes and gathering the pieces to continue cutting. The result may be uneven particle sizes, but it can still yield a usable cup if you’re patient and willing to test and adjust. It’s a testament to the resilience of home brewers who improvise under constraints, understanding that the trade-off is flavor variability rather than a flawless, salon-grade grind.
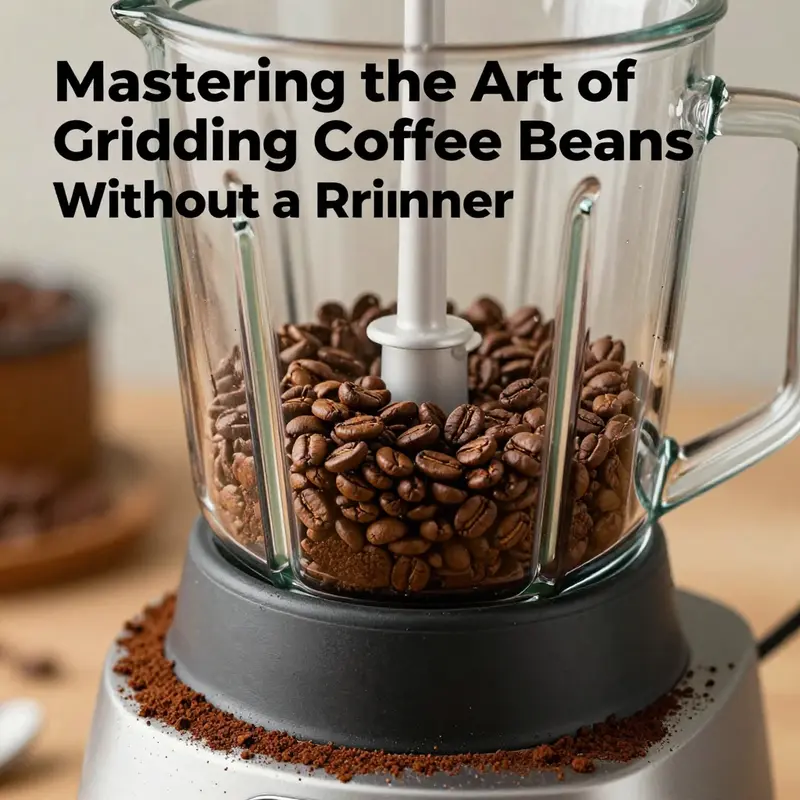
A quick pulse in a blender or food processor is another widely used option, particularly when you need a faster result. Load up to about 50 grams of beans and pulse in short bursts—five to eight pulses—checking after each interval. The heat generated by friction is the enemy here, so you must avoid long, continuous blending. Short bursts help keep the aromatics intact while achieving a grind size somewhere between medium and medium-fine for many brewing methods. The key with any blender approach is to stay in control and to pause often to assess texture and fragrance. If the mixture begins to feel warm or sticky, you’ve gone too far and risk flavor degradation.
Beyond the mechanics of grinding, the timing of the grind remains the most crucial lever. The moment you finish grinding and the moment you pour hot water over the grounds—the extraction moment—are tightly linked. The longer you wait, the more the volatile compounds drift away, and the less your coffee tastes like the coffee you expected to brew. The oils, which contribute depth and mouthfeel, also begin to dissipate as air swirls around the grounds. For this reason, store your beans in a sealed, opaque container away from light and moisture, and only grind what you need. This approach protects the freshest oils and compounds for the brew you are about to enjoy.
As you experiment with these methods, you’ll notice that your cups begin to reveal a more nuanced sweetness, brighter acidity, and a fuller body when you minimize pre-grind time. The act of grinding without a grinder, when done thoughtfully, is less about recreating a boutique gadget and more about respecting the bean’s natural profile at the moment of contact with hot water. It is about practicing restraint—grind, brew, and enjoy. And it is about recognizing that the process itself can be as delightful as the drink it yields when you approach it with intention and curiosity.
If you want a deeper look at the science behind freshness and why freshly ground coffee matters, a reputable resource discusses how the timing of grinding affects aroma, flavor, and extraction in detail. For a broader look at the importance of freshness in your coffee ritual, you can explore more here: https://www.perfectdailygrind.com/why-freshly-ground-coffee-matters/.
Final thoughts
Effectively grinding coffee beans without a dedicated grinder not only enables you to maintain flexibility in your business practices but also allows for a broad range of brewing methods. By utilizing common household items, you can ensure that your customers enjoy fresh, aromatic coffee every time. Implement these grinding techniques in your operations to elevate the quality of your drinks and enhance customer satisfaction. Remember, the key to great coffee lies in freshness, so always grind just before brewing.